


BornSinner
-
Posts
4,065 -
Joined
-
Last visited
-
Days Won
3
Content Type
Profiles
Forums
Gallery
Store
Events
Posts posted by BornSinner
-
-
This How-To was brought to you by "kangaroo" and ws done on a 05 Yamaha R1
This write should help you on any other type of bike that you are changing gears and your chain.
GoodLuck
I have finally swapped chains from a 530 to a 520. It's a good idea to swap chains every 10-15k miles. They're relatively not expensive and wear out over time. If you race, of course chain life shortens dramatically. My bike's at 16k and half of miles were spirited canyon rides so I thought a change would be good and about time. Here's a how to and what's involved. The cost for a new chain 130. Chain tool another 80.
Tools needed:
36mm socket for the countershaft nut for 98-06
30mm socket for 07-08
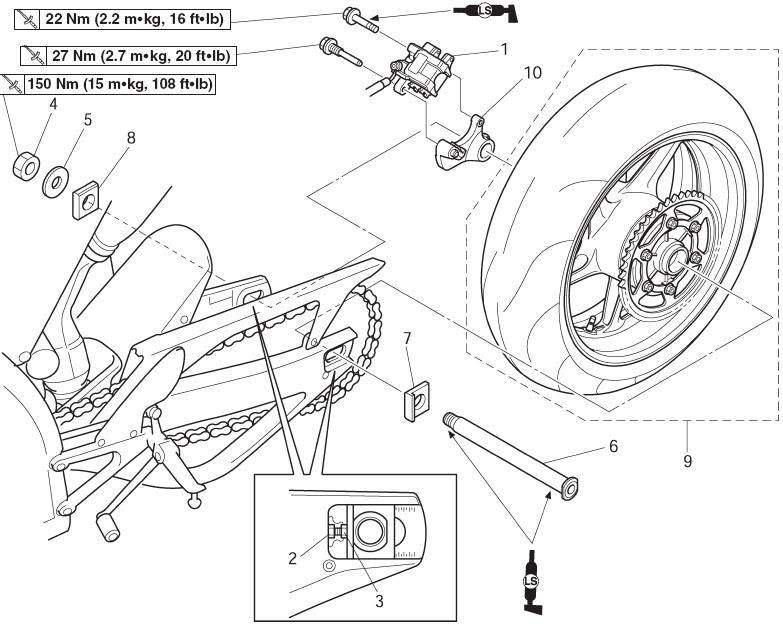
32mm socket for the rear axle
5mm allen wrench for the sprocket cover
12mm wrench for wheel adjusters
10mm wrench for shift shaft
grinder attachment to electric drill
hammer
screwdriver or chisel
rear wheel stand
RK chain riveting/breaking tool
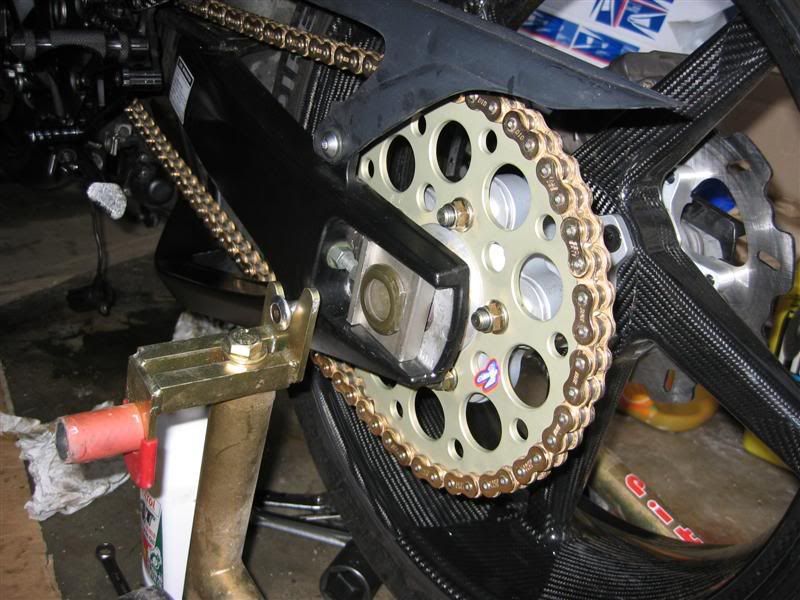
This starts with the bike elevated and the rear wheel removed. Run a search on how to remove the rear wheel if you don't know how. I made one as well as others. The bike is going from the stock 530 chain to a DID erv3 520 chain. This is a popular mod as the chain is thinner and weighs significantly less. So again a major benefit to your acceleration/maneuverability as your MOI drops. I have a 16 tooth Sprocket Specialist alloy countershaft sprocket and a 45 tooth Renthal alloy rear sprocket. I don't know the exact amount of weight I am saving but it is lighter than before.
Picture 1, shows how to remove the rear tire
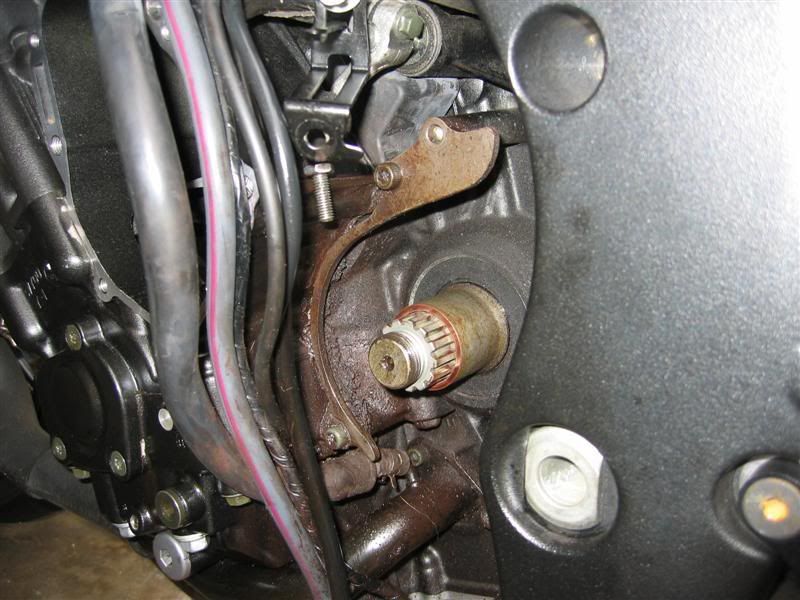
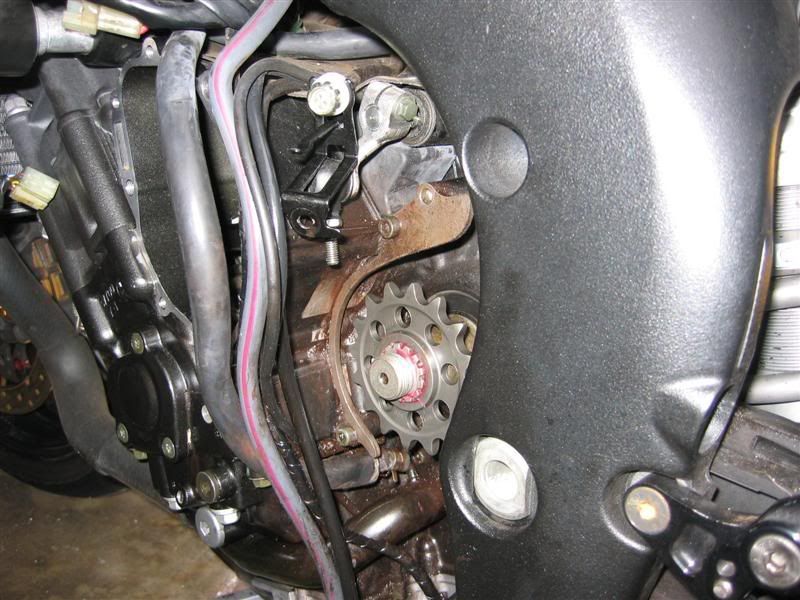
Picture 2, shows how to get to the countershaft sprocket
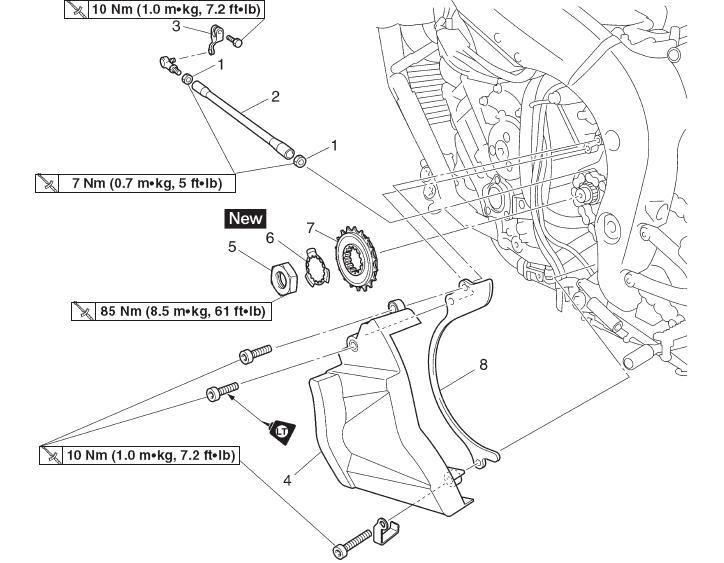
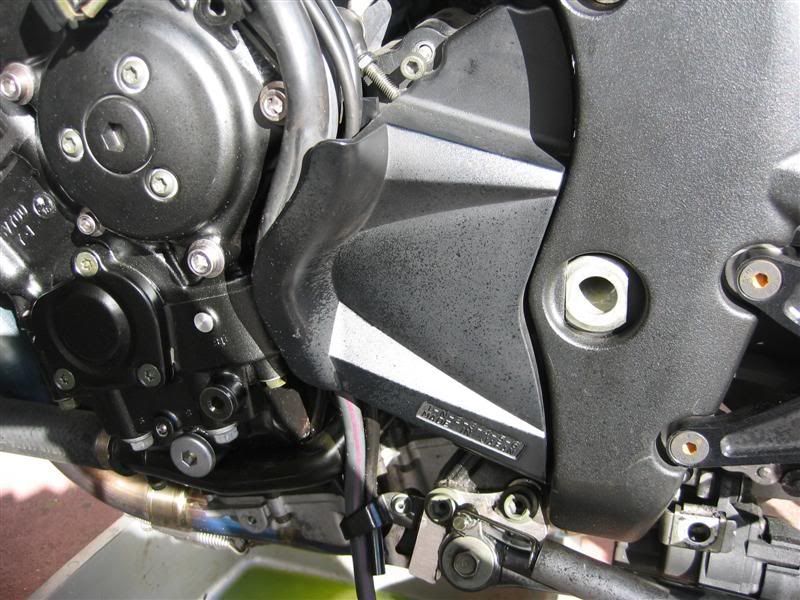
Picture 3, to get to the countershaft sprocket remove shift rod. Mine is a gilles but the same idea applies.

Picture 4, remove the sprocket cover by taking out the 3 allen bolts, note one is longer than the others. I have one removed already in this pic.
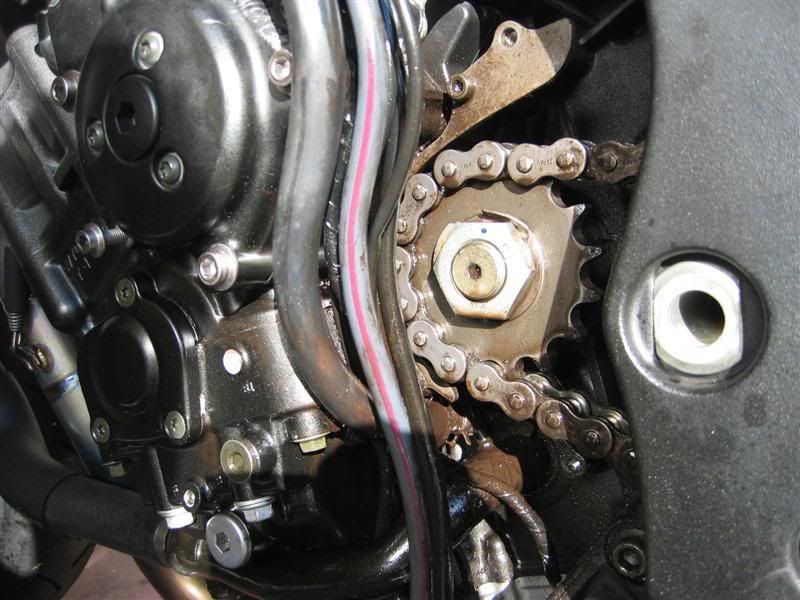
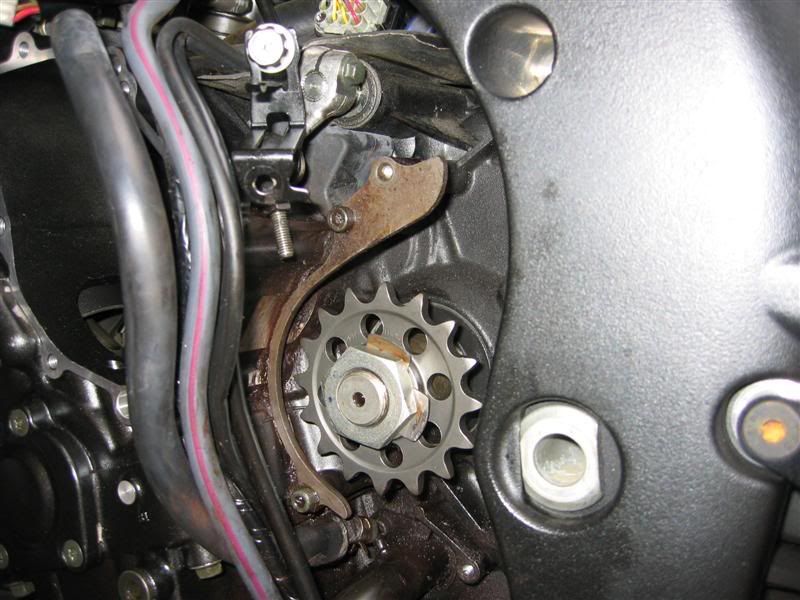
Pic 5, how it looks with the cover removed. Push back the lock washer with a screwdriver and with a 36mm socket loosen. Trick is to hold the rear brake lever down as you torque it open
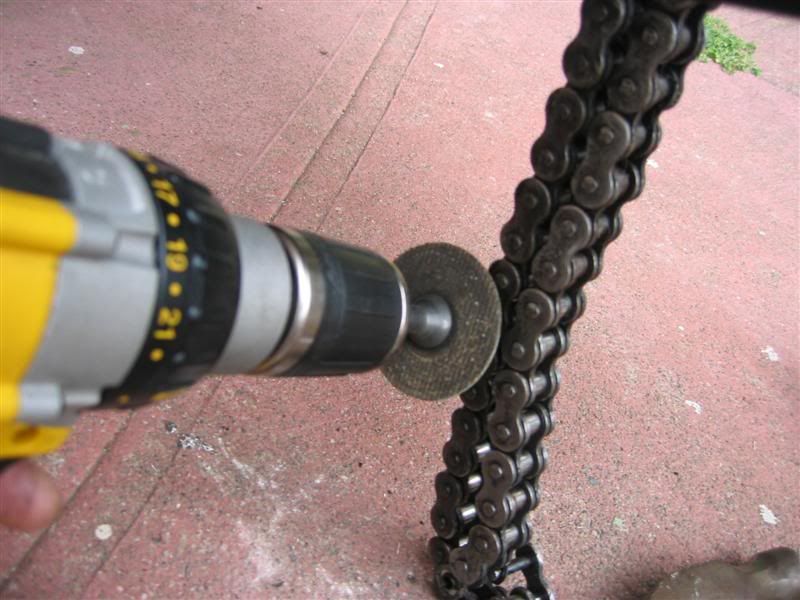
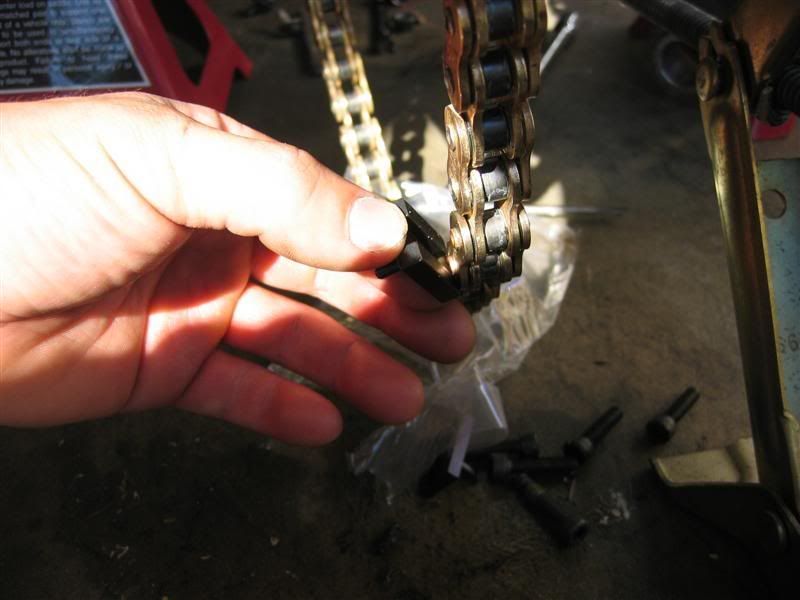
Pic 6, now to break the chain, grind off the rivet, choose any rivet.
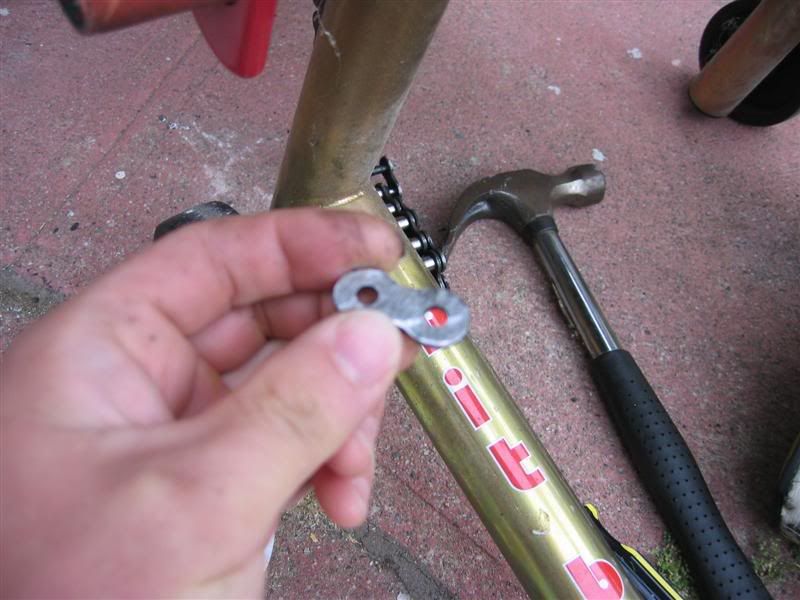
Pic 7, once the rivets are ground flat, insert a screwdriver or chisel between the outer and inner link and hammer away gently. Once wedged in, give it a twist and the ground link should pop out and look like this.
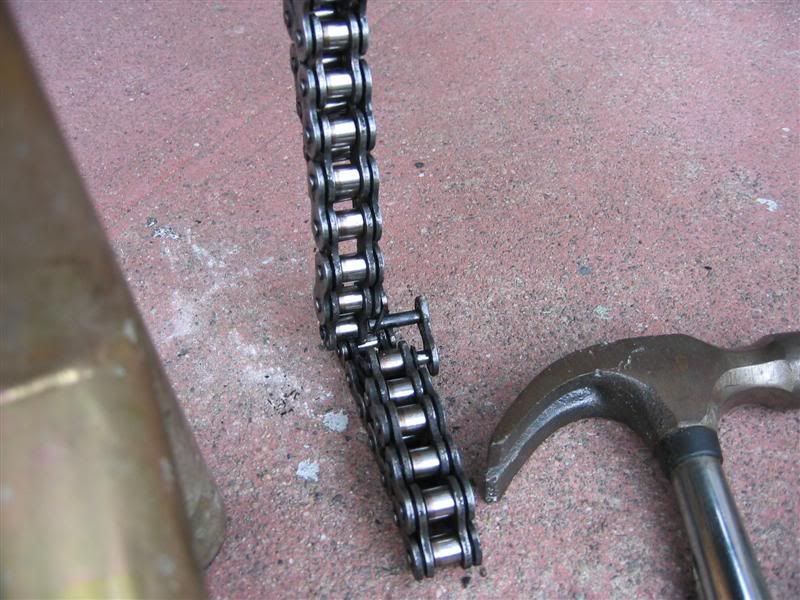
Pic 8, shows the other link sliding out. Then you can remove the old chain. Be careful when removing so that it doesn't scuff up your swingarm.
Pic 9, comparing the 2 countershaft sprockets. The solid is the old AFAM 530 and the new one the 520.

Pic 10, shows the significant difference in widths.

Pic 11, with the countershaft removed, clean up the area with wd40 and an old toothbrush of wax and lube gunk that built up over time.
Pic 12, install countershaft with some bearing grease on the inside mesh.
Pic 13, add lock washer and nut but do not tighten yet.
Pic 14, new chain, remove 4 links for the stock length of 116 links for the 04 and 05, for the 06 - 118 links. Again using the grinding tool remove the rivets. But be careful so that you don't scratch the new chain accidentally.
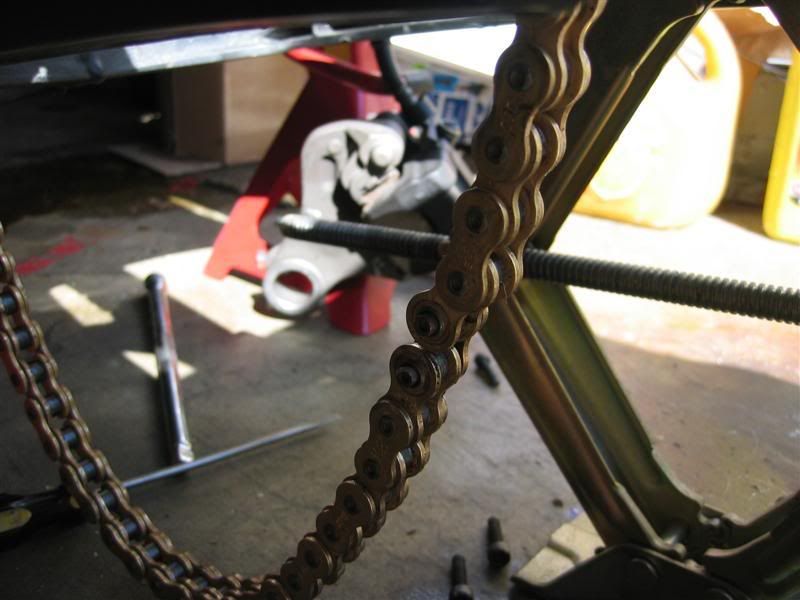
Pic 15, install new chain carefully over the countershaft sprocket to minimize scuffing to the swingarm and through the lower swingarm brace.
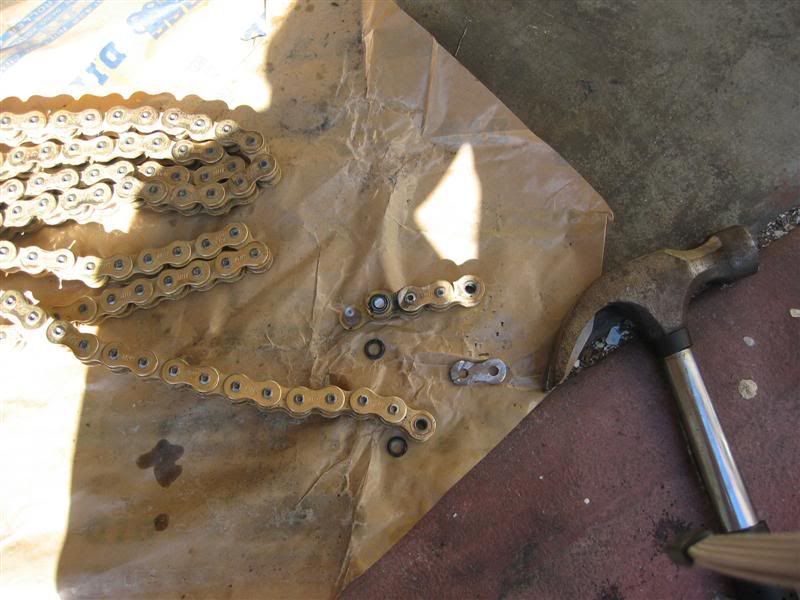
Pic 16, master rivet link, add rubber o-rings
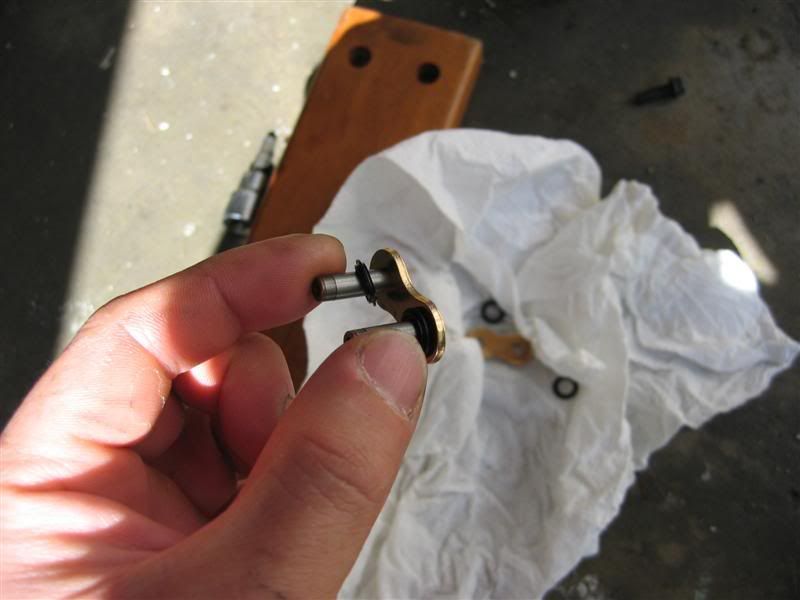
Pic 17, insert and connect between the 2 ends
Pic 18, add the 2 remaining o-rings and the side plate. Also shown is the side plate press that attaches to the riveting tool
Pic 19, riveting tool and side plate shown
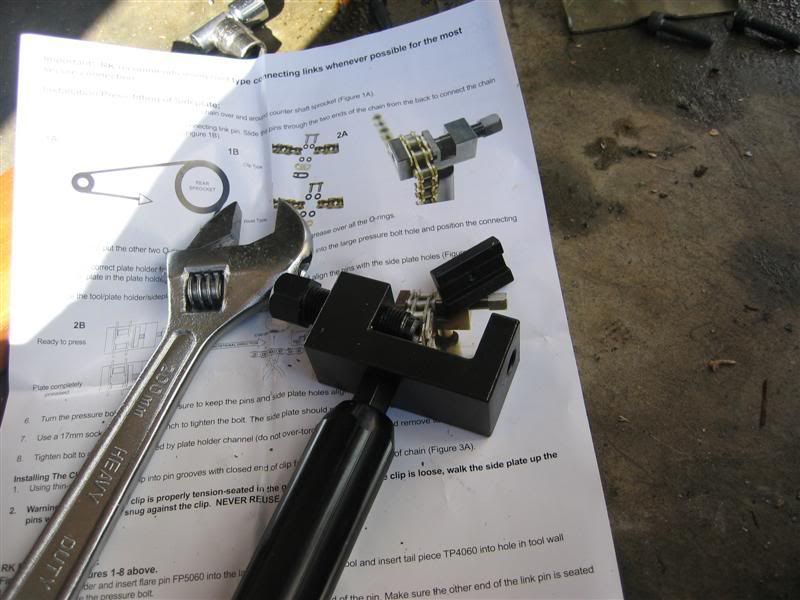
Pic 20, slide plate with indent for the rivets close shot.
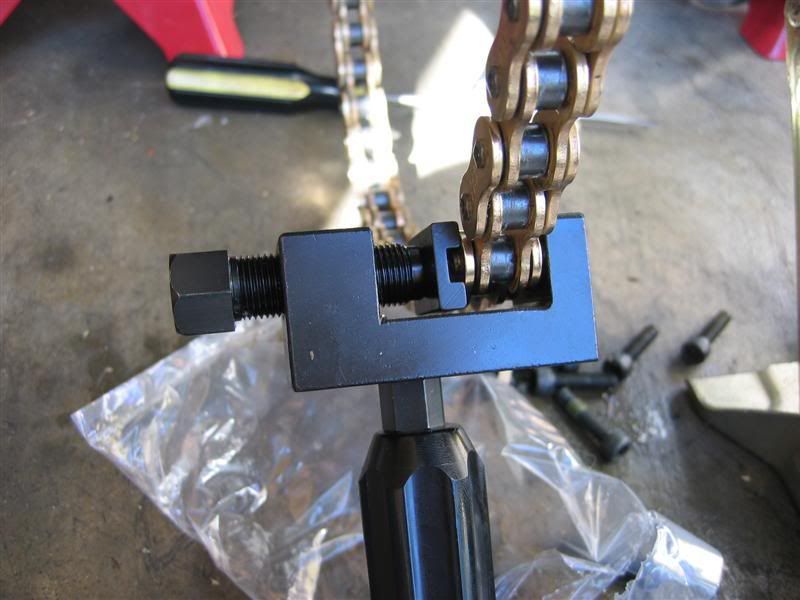
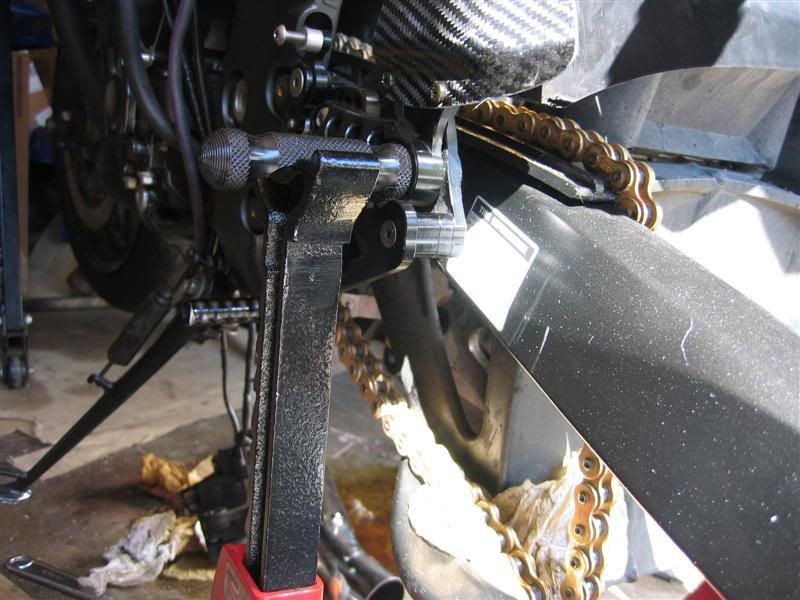
Pic 21, crank with wrench until rivet heads come out and the plates are the same width as the other links. Also the tool will no longer turn after a good press.
Pic 22, now to flare, using the flare insert and the rivet indent which holds the chain in place.
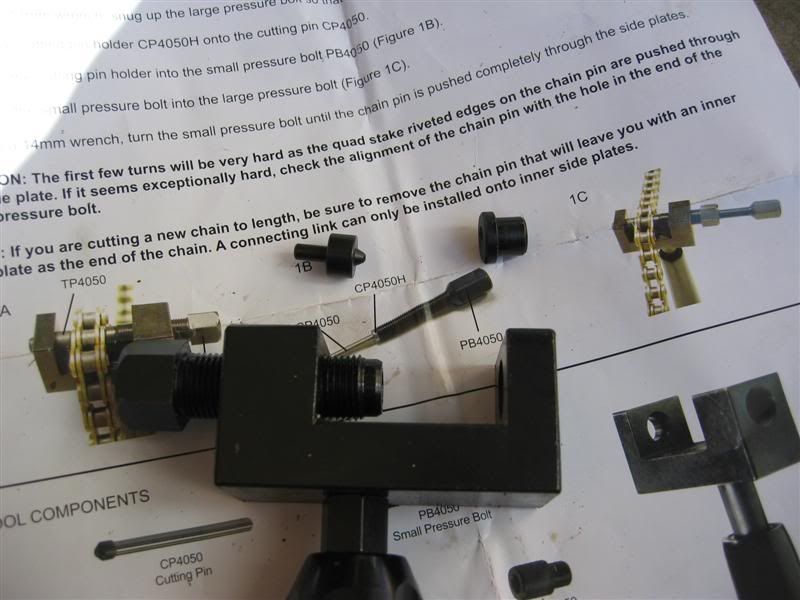
Pic 23, insert and press again and make both flares look like this. Turn until you can see the flare visually expand and it stops. This part is THE MOST IMPORTANT part you get right cuz if the chain breaks, it will break here and crack your case. You'll be out major bucks. If you're not sure get it to the dealer for the final flare or check.
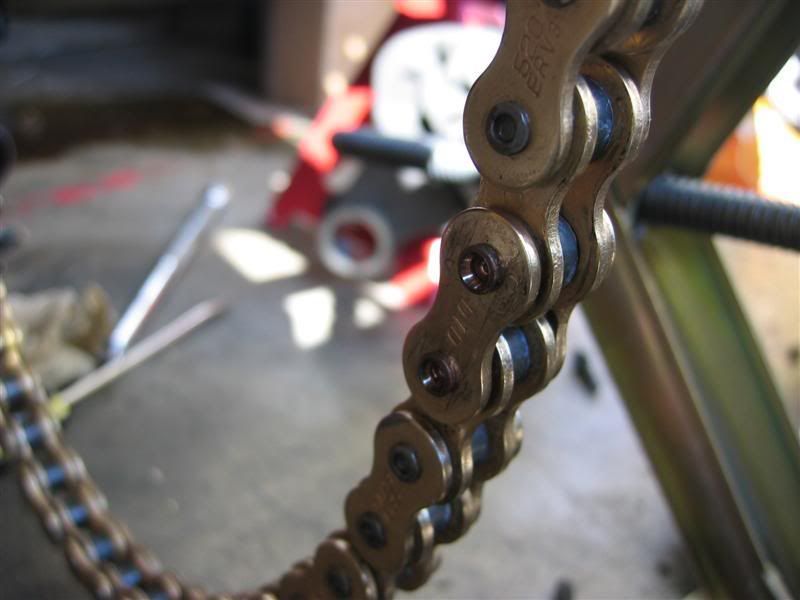
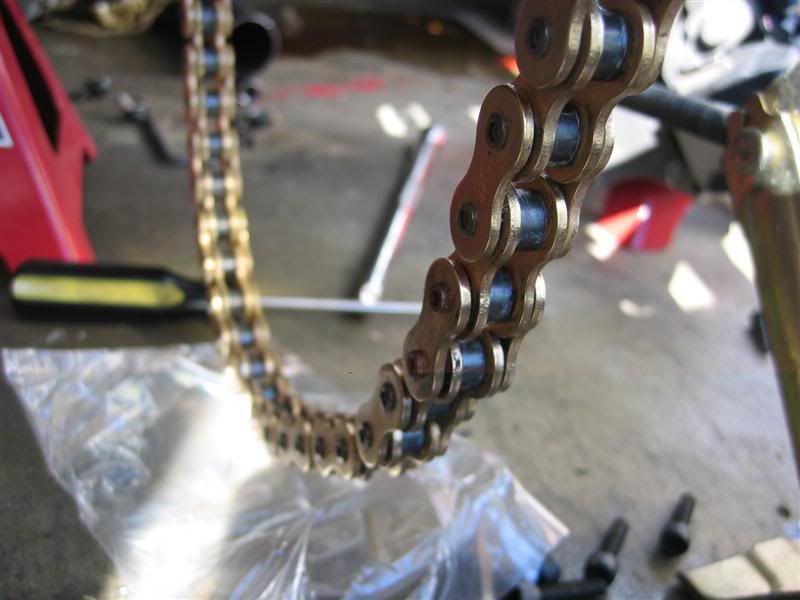
Pic 24, rear wheel mounted and chain looped over the wheel. You can wipe away the factory grease and show the beautiful shine.
Now one last thing is to torque the countershaft sprocket nut. Again have someone press down on the rear brake and then torque it to the specified amount. Fold down the lock washer over the nut. Reinstall the sprocket cover and you're done
-
Cool stuff.
I may have to do this to.
thank you
If there are mod or how-to's that you are wanting or looking for... (SERIOUS REQUESTS ONLY)
Please let me know
-
It seems that WHITE is going to be the HOT color this year.....
"You know what they say...
Once you go WHITE...
is so RIGHT...."
 :thefinger:
 -
I may be going..let you know soon
AATTTAAA

-
I may be going..let you know soon
Are you going to visit your SON

-

And here come those words I told you about....
"OHH I forgot to tell you honey....."
 :D:D
:D:D -
Yes, they have a bike category. Yes, we need to get some bikes in this. I'm emailing them today about that, and possibly getting a booth.Let me know about booth arangements. I shall help.
Im in it for the booth and the B I K E
-
Bikes in this????
-
Flounder
I will say.....
Those are the funnest pic i have ever seen....
GOOD JOB
-

By far this one got my VOTE

 :plus1:
 -
she didnt drop a bike at the show...
she got that because, her GSXR was a bit to tall in the seat...and timbered it at a stop
-
Armageddon!
that is some funny shit
-
Where and when did this happen...
I was just in that forum and its up and running:confused:
 :confused:
 -
She has been named "TIMBER"
-
I dont know if is
"thoughtful"
or
"I hind the the bushes to watch you paint your toe nails"
creepy!!!!
Just in cause We should PM this to her.
:D
-
Im always looking for parts......I will pm you
-
i love that new Duc. 848
Thats one sexy Itailan....
Well besides.....me
-
Did I remember to pay my Insurance
-
"weeeeeeeeeeeeeeeeeeeeeeeeeeeeeeee"
-
Thats good....did you take in pictures....????
He is working on a couple of parts for me...then I have to have him wet sand the tank....I was Iron Pony and some fu*king dickhead scratched the tank
-
You ass!! "bornsinner"
You got to laugh....that is funny:D:D:dunno:
:D -
Nice pics like always Whitey.
Why...Thank you Pedro
How did the paint work turn out????
-
I think I will get Jack Mehoff's 250.....

-
Im going to rock that jacket this year....hahahaha
How-to Requests
in Tech and Tips
Posted
I will try to find that, your a net surfer, and you cant find a write up
It seems to be mainly a Suzuki and Honda mod
I will try to whip something up for you