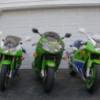
snot Posted June 4, 2013 Report Share Posted June 4, 2013 Looks awesome! Quote Link to comment Share on other sites More sharing options...
2fat2fly Posted June 4, 2013 Author Report Share Posted June 4, 2013 Looks awesome!Thanks Snot! Quote Link to comment Share on other sites More sharing options...
redkow97 Posted June 4, 2013 Report Share Posted June 4, 2013 The 12 looks and sounds great! ...now why aren't you racing the YSR? Quote Link to comment Share on other sites More sharing options...
2fat2fly Posted June 5, 2013 Author Report Share Posted June 5, 2013 The 12 looks and sounds great! ...now why aren't you racing the YSR?Thanks. I don't race it because I have waaaaaaay too many other things going on. I'd like to but time and money are always the two factors that dictate what you do and when you do it. Quote Link to comment Share on other sites More sharing options...
2fat2fly Posted June 5, 2013 Author Report Share Posted June 5, 2013 Today's work on the 12 is relatively simple for me. I pulled the ECU to send off for a re-flash. I should have it back in about 1 week.: Quote Link to comment Share on other sites More sharing options...
2fat2fly Posted June 6, 2013 Author Report Share Posted June 6, 2013 I'm going to explain why I'm getting the ecu flashed now, instead of earlier in the build. I was going to get it done previously but couldn't decide on the electronics package I wanted without more research. Now I know which way I'm going with it so I need to get the computer flashed to accept the other mods.Long story short; I'm going to splice in a Power Commander 5 from a GSXR 1000 and Autotune set up to make my computer a closed loop system. There is no Powercommander V for the ZX12R. To do this I need to raise the rev limit to 12,700RPM. The other two reasons for raising the limit are land speed racing and drag racing. If I can keep it in a lower gear when I'm close to the finish line then I'll get a quicker E.T. since I'm not wasting milliseconds (or seconds) shifting gears. I can just run up into higher rpm and not tag the rev limiter. The same goes for LSR. If I can rev higher I can go faster. The reason for the GSXR PCV is the extended revs.I live 20 miles North of the Ohio Mile and 15 minutes from a dragstrip so I'm gonna play when I have the opportunities.Yes, I am experiencing delusions of grandeur.__________________ Quote Link to comment Share on other sites More sharing options...
Helmutt Posted June 6, 2013 Report Share Posted June 6, 2013 I'm excited to see your drag/mile performances. Hit me up when you plan to do either/or. Btw, Ohio Mile is running this weekend! Quote Link to comment Share on other sites More sharing options...
2fat2fly Posted June 8, 2013 Author Report Share Posted June 8, 2013 Here's a list of the stuff that has been added to the bike. There are a couple on here that are not installed yet: ZX14 Fuel injectors PCV & Autotune K&N Air FilterI've paid for them and they are on their way. As soon as I get them they will be installed.Anyway, here's the list for anybody interested:Aeromotive: Fuel Pressure RegulatorAPE: Adjustable Cam SprocketsAutometer: Boost Guage Fuel Pressure Guage Shift LightDaytona Sensors: Wego IIIDEI: Exhaust Wrap Heat SleevesDynojet: Power Commander V AutotuneEarl’s/Edelbrock/Russell: Braided Lines & Fittings for Fuel & Oil LinesFactory Pro: EVO SHIFT STARFalicon: Billet Clutch BasketGarrett: T3 Super 60 TurboKawasaki: ZX14 Fuel InjectorsK&N: Air FilterMPS: Air Compressor Air Shifter Kit Sport Bike Shift Kill Box Tether Kill SwitchMTC: Multi-Stage Lock Up ClutchMuzzys: Adjustable Ignition Advancer Dry Nitrous Kit Lowering Links Mirror Block Offs NO2 Bottle Bracket Oil Filter Relocation Kit Performance Clutch Kit Velocity StacksRobinson Industries: Transmission First GearSchnitz Racing: Front End Lowering Strap Turbo Scavenge PumpSpeigler: Front & Rear Brake LinesSuperbike Mike: 4” Weld-In Swing Arm ExtensionsWalbro: Fuel PumpFabricated Parts by me and/or my brother: Airbox Block-Off Plates Air Shifter Cylinder Brackets Assorted Brackets Chain Guard Drilled Intake Camshaft For Cam Position Sensor (used as exhaust cam) Fuel & Oil Lines Kickstand License Plate Bracket Oil Pan Window Ported Head Reed Valve Block-Off Plates Turbo System Under Tail Wire Harnesses For Accessories Quote Link to comment Share on other sites More sharing options...
Helmutt Posted June 9, 2013 Report Share Posted June 9, 2013 That's quite a list! What gen ZX14 injectors did you intall? I believe Kaw went from an 8 to a 10 port tip on the '08+ but the 3rd gen may be bigger/better than that with the displacement increase Quote Link to comment Share on other sites More sharing options...
2fat2fly Posted June 9, 2013 Author Report Share Posted June 9, 2013 That's quite a list! What gen ZX14 injectors did you intall? I believe Kaw went from an 8 to a 10 port tip on the '08+ but the 3rd gen may be bigger/better than that with the displacement increase2006 is a 440cc injector. 09-newer is 330cc with a better tip. I need the 06-07 injectors to support the fuel requirements due to the duty cycle of the injectors. Quote Link to comment Share on other sites More sharing options...
2fat2fly Posted June 13, 2013 Author Report Share Posted June 13, 2013 Alot of parts have finally shown up via UPS, US Mail and a local bike shop: My day looks to be a really good one. Quote Link to comment Share on other sites More sharing options...
2fat2fly Posted June 13, 2013 Author Report Share Posted June 13, 2013 I got a PC V and autotune. Dynojet doesn't make one for the ZX12R's, so if you want one you have to be willing to modify a brand new one intended for another bike. I'm using one for the 2007-08 GSXR 1000's. It will work with another part I received today: This is my original ECU just back from getting hacked. I had the rev limit raised to 12,700rpm. I hope to drag race and do some LSR events when I have the opportunities and I want the bike ready to load up and go. I don't want to be scrambling to get it together to make an event, so I'm doing everything I can right now to have it ready to go. That's why I spent the extra down time (even though I already have the bike running) to get the ecu hacked and now I'll be wiring everything together. Once this is all done it should be; let me repeat that; SHOULD BE as trouble free as possible. We alll know how that works though. Stuff breaks. At the worst possible time usually. Here's the hacked ECU:Bottom view with the programming cable hooked up: To mod these older ECU's you have to cut them open and solder on the circuit board. Here's the cut-outs: Cable removed: Here's the top view: You have to cut into this side to access the board to perform the mod. Once the mod is done you don't need to access this side anymore.The programming cable is for going back into the computer and setting the fuel tables, etc....I also have a 3-bar map sensor coming that I will be wiring into this system so I can safely run up to 28-30 pounds of boost and this system will be able to control the fuelling of the system. That's the plan anyway. We all kno how plans go when mechanical and electronic toys are involved.... I don't ever plan to run that much. The most I plan to run will be no more than 20 and it will more likely stay in the 14-17lbs of boost range. That will come after I tear the engine down and add turbo pistons, etc. so the engine will live.All this part of the build is possible due to insight and information provided by other enthusiasts who are much smarter than me. They did all the research and development on this type stuff.I'm just trying to combine all that into one workable solution for my project. All I did was listen to what they had to say. Quote Link to comment Share on other sites More sharing options...
2fat2fly Posted June 13, 2013 Author Report Share Posted June 13, 2013 The last part is ZX14 Throttle bodies. I'm taking the fuel injectors and installing them in my 12. This should be the last part of a fuel system capable of feeding this beast. Quote Link to comment Share on other sites More sharing options...
Blitz Posted June 13, 2013 Report Share Posted June 13, 2013 Crazy awesome build man! Very cool. Would love to see it sometime at an OR event. Quote Link to comment Share on other sites More sharing options...
2fat2fly Posted June 14, 2013 Author Report Share Posted June 14, 2013 Crazy awesome build man! Very cool. Would love to see it sometime at an OR event.Thanks. I hope to be riding it daily, soon. Quote Link to comment Share on other sites More sharing options...
2fat2fly Posted June 14, 2013 Author Report Share Posted June 14, 2013 I had to cut up a perfectly good and new PCV to get it mounted on my 12. I started out with the wiring diagram for the 12 and labelled everything for the 12's old pc III. I used someone else's research on the PCV to label it. Then I started cutting and splicing. The PCV: The PC III: Before: During: After: I just need to program it and put it on the bike. Hope it works....:ohno Quote Link to comment Share on other sites More sharing options...
2fat2fly Posted June 14, 2013 Author Report Share Posted June 14, 2013 I spent most of today going over the PCV and Autotune stuff to make sure I had it right. I don't want to smoke any new toys on engine start up because I wired something backwards.The Autotune requires a switched 12v power source but the wire as no connector on it so you need to connect it however you want to a power source. I had all those connectors left over from modding the PCV so I decided to re-purpose a couple. The connectore that went to the #1 fuel injector had red wires in it so I used that set of connectors to attach to the tail lamp circuit (same as the PCV) and make it so I can unplug the Autotune if it ever becomes necessary. I spliced into the old PC III power connector so the stock wire harness is untouched and I can literally unplug all the hot rod parts and remove them without leaving any trace they were there. Right now I'm waiting on my lap top computer to charge so I can calibrate a couple things and fire the bike up. Quote Link to comment Share on other sites More sharing options...
2fat2fly Posted June 14, 2013 Author Report Share Posted June 14, 2013 It works. Quote Link to comment Share on other sites More sharing options...
Helmutt Posted June 18, 2013 Report Share Posted June 18, 2013 Looking like you're about done with buttoning it up. Nice work Mike, it will definitely be easier to make changes with all the new additions! Quote Link to comment Share on other sites More sharing options...
2fat2fly Posted June 19, 2013 Author Report Share Posted June 19, 2013 Looking like you're about done with buttoning it up. Nice work Mike, it will definitely be easier to make changes with all the new additions! Thanks. I still have a bunch of things to do to it. I'll spend tomorrow and Thursday addressing some issues with it and hopefully be able to twist the throttle with bad intentions by Thursday night. I have some insulation to install, wiring work to do, mapping/programming work, fuel system work, oil line tweaking and a few dozen other things to address. I also got a chance to talk to an engine & chassis builder today that I've known for many,many years. He surprised me with a little information I'll be putting to use on this bike. I'm looking forward to trying it and seeing the results. Quote Link to comment Share on other sites More sharing options...
1fasttc Posted June 19, 2013 Report Share Posted June 19, 2013 wow what an awesome project! Quote Link to comment Share on other sites More sharing options...
2fat2fly Posted June 20, 2013 Author Report Share Posted June 20, 2013 Today was a busy day for me. I had to fix a heat issue with a fairing, install the ZX14 fuel injectors, mod the throttle body to accept the ZX14 fuel injectors, mod the vacuum system to support the 3 bar map sensor, and a couple other things. Here's pics of the progress:Exhaust pipe ( even though it's heat wrapped) melted into the insulation and dimpled the fairing. I caught it before it did any real damage. You can see the dimple on this one: I stopped at Jeg's on the way home from work last night and got an adhesive heat shield. Then I installed it today. Quote Link to comment Share on other sites More sharing options...
2fat2fly Posted June 20, 2013 Author Report Share Posted June 20, 2013 I had my work cut out for me to install the zx14 injectors. There was alot of minor modding to do to he fuel rail and throttle bodies.The ZX14 injector is way shorter than the ZX12R injector. To install the injectors I had to "shorten" the mounting area on the throttle bodies and fuel rail. I removed 0.100" from the TB's fuel rail mounting pads and 0.100" from the fuel rail mounting tabs. The rest of the distance was made up by installing the lower o-rings from the 12's injectors below the 14's o-rings. This stack-up and the material removal on the top part closed the distance enough to install the 14's injectors. Upper rail before grinding: After: Throttle Body's fuel rail mounting pad after: Injector mounted: Quote Link to comment Share on other sites More sharing options...
2fat2fly Posted June 20, 2013 Author Report Share Posted June 20, 2013 Had to gain clearance for the fuel return line as well: Before:During: After: I needed clearance for the injector plugs as well: After: Quote Link to comment Share on other sites More sharing options...
2fat2fly Posted June 20, 2013 Author Report Share Posted June 20, 2013 I also did the famous ZX12 pilot jet mod (google it for more info). It's usually done to smooth out hte idle on a header equipped ZX12R. I did it to help insulate the inlet air pressure sensor from boost pressure. I also did some other things to help with that but I have no pictures of it all yet. Mikuni 12.5 pilot jet: Installed in the vacuum hose for the IAPS: That's all for today. I'll post more pics of today's progress and tomorrow's progress later. Quote Link to comment Share on other sites More sharing options...


Recommended Posts
Join the conversation
You can post now and register later. If you have an account, sign in now to post with your account.