Smokey Posted July 3, 2016 Report Share Posted July 3, 2016 aka thegreatwhitehope aka Janky 2.0 - slightly less Janky - I hope Some of you will remember that I had a silver 93 touring Rx7 for a little over 7 years. I developed that car into a great track car, and then it died a warrior's death. I faced a decision to pick up the pieces and continue on the FD platform or go with something new. As you can tell by this thread I'm continuing on with my addiction to the Rx7. I may not be the smartest, and a glutton for punishment with this platform, but this is a hobby of passion which I have for the car for sure. So this thread will follow as I take a bone stock FD that I bought and get it up to the level of track and street duty that I would like. I bought the car over a year ago, so I'm a bit late on making this thread, so I'll try to catch up. The goal: I want to have a car that will perform as well as the last car on track, and be a nicer overall car if possible. My goal is to have it be about 80% track miles and 20% track miles. You might laugh at that, but the last car was over 90% track miles as it'd go to the track, come back and go on jack stands to get worked on, then go to the next track day. So I'd like to get some more street time on this one..haha. The car: I had been looking for some very specific things in prospective cars: *I wanted a non-sunroof car so it had to be a base model or R1. Also didn't want the rear wiper or wing from touring cars. *had to be a 5-speed with black interior. Knowing the platform, the cost/complexity of swapping tan to black is too much for my liking. I had the 5-speed swap parts, but it's also a major pain to do correctly so not worth it *could not be yellow or blue colors. no go for me. Color preference was Red, White, Silver, and then Black in that order. Ideally I wanted a red base model or R1/R2 car. Mods I wasn't overly worried about because I had base of parts I was going to use, but was more concerned with condition and trying to not find something beat to crap. The market had me feeling negative as it seemed to be a bunch of really ratty cars or people unloading 20k mile stock pieces for bigger money. After almost a month of daily searching I found this car on a Friday night on Autotrader. It was at a consignment dealer in Richmond, VA. It was after hours so I called first thing in the morning. They couldn't tell me crap about it, history, etc. The car was a base-model 94 white with black interior and 5-speed. It was also stock except for a "$4K stereo" according to the dealer..LOL. It was everything I was looking for with the exception of red, so I'd make that compromise. It just so happened that my former bosses-boss lives in Richmond and is a car guy. We had a good rapport so I called him and he went and checked it out for me that morning. He called to tell me it was exactly what I was hoping for in a stock survivor with minimal paint work (LF Fender), and for the most part hadn't been f'd with too bad. So I knew I wanted the car...the issue? The dealer wouldn't take a deposit and it was after 12pm on Saturday so I couldn't wire funds. They had 3 other people coming to look at the car later that afternoon, so my friend did me a HUGE solid and put up money for the car for me to hold it on my behalf until I could wire funds Monday. I wired the funds, and then told my boss I needed a personal day and got the trailer loaded up. Left at like 3am Monday night on a cannonball to VA. Got to the dealer around 11am the next day, loaded the car, got lunch, and then brought her home to get back around 8pm Tuesday evening. http://i193.photobucket.com/albums/z56/kutschca/white%20car/B20C777E-4089-452A-A9D0-6CD390209D5D_zpsu58hyit6.jpg http://i193.photobucket.com/albums/z56/kutschca/white%20car/9CF736AE-142E-46BE-A178-0F271C23AD1E_zpst82osnib.jpg http://i193.photobucket.com/albums/z56/kutschca/white%20car/80845FD5-5B94-48B4-8401-AA45FEB22449_zpshtwnqpg3.jpg Quote Link to comment Share on other sites More sharing options...
Smokey Posted July 3, 2016 Author Report Share Posted July 3, 2016 Back to overall goals for the car for a moment. I want the car to be able to get up to the same level of speed as the old car on a very similar setup. Then I can develop from there. My previous best was 1:38.7 at Mid Ohio with the old car, so that means I need to turn in the 1:39s at Mid Ohio on Nittos to fulfill that need. The setup will consist of Engine: Same engine as the silver car. Simplified sequential twin turbo setup at 13psi (315-ish whp), 3" exhaust, custom intakes, PFS intercooler, Fluidyne radiator, dual aftermarket oil coolers, Apexi PFC ECU, water injection for safety Drivetrain: Stock trans and diff, but with bigger fluid pans for extra capacity. Suspension: Ohlins road and track DFV, 11kg springs front/rear. M2 aftermarket toe links and trailing arms, Tri-point front sway bar, Improved Racing adjustable rear sway links (stock bar) Brakes: AP racing front brakes with their 72-vane j-hook rotors, Sakebomb racing rear 2-piece rotors and spacer to use caliper on the bigger rotors Wheels/Tires SSR Comp 17x8.5 front with Nitto NT-01 255/40-17. 17x9.5 rear with 275/40-17 NT-01 Safety: Custom welded in roll bar, ultrashield aluminum race seats, Schroth harnesses so in the midst of buying this car when I got home my wife told me she wanted to sell our condo (which with 2 kids we had outgrown) and buy a house! Well at least I had already got the car! but that also meant I wouldn't be able to mess with it for a while. The car wasn't perfect. It had a high idle, wouldn't make full boost all the way to redline, and while the car was "clean", the under hood, door jamb, and hatch area were shockingly nasty. I think the previous owner parked it under a tree or something regularly. I also lost my garage during the time of the move/transition so I couldn't really do much. The first changes were that I was dog sitting for my brother and stayed at his place and borrowed his garage for a few simple but important updates. Coilovers, wheel, and R1 lip. Gotta look good AMIRITE?! The rear coilovers were damaged in the past wreck so I had to have them sent to Ohlins and repaired, but they took care of me well. Good customer service. I had to roll the fenders on the new car to make sure I could fit both my street and track wheels. http://i193.photobucket.com/albums/z56/kutschca/white%20car/AB422E3A-1786-4F37-B777-49CD77396ABB_zps0ca6fkfn.jpg http://i193.photobucket.com/albums/z56/kutschca/white%20car/210378C9-94B2-4316-995C-1FD7C092802E_zpsnymnbosk.jpg http://i193.photobucket.com/albums/z56/kutschca/white%20car/EFE59264-7C4A-4DC5-AEC1-290A75860BF5_zpss3fpto4i.jpg Goodies installed: http://i193.photobucket.com/albums/z56/kutschca/white%20car/36FAA4AF-0CE1-4F99-97A8-73FE7D14484D_zpsdkdzloq1.jpg http://i193.photobucket.com/albums/z56/kutschca/white%20car/125066AE-581E-4C13-8041-72662627173D_zpsdfywt7wn.jpg You remember me saying the engine bay was nasty? Here's a good example of me just cleaning up around the shock tower when doing this work. Didn't have time for a full clean which happens later: http://i193.photobucket.com/albums/z56/kutschca/white%20car/049EA875-DE12-4F38-A01A-ECA44A72F96C_zpse8ovuhnr.jpg http://i193.photobucket.com/albums/z56/kutschca/white%20car/5F53285B-9CF0-4E83-85E9-6859796E2C44_zps6x3xk92c.jpg I also took the time to change the trans fluid in hopes of better shifting (didn't want to go into 1st) http://i193.photobucket.com/albums/z56/kutschca/white%20car/4388C041-B97F-4C1E-AD81-F10B81EC90C4_zpso57tynzd.jpg Of course working on a 22 year old Mazda always has its pitfalls. I think some of the dirty issues may have also been related to critters with this car. I found a bunch of rusty hardware up front like a cat had pissed under the car or something cause that's the only time I've seen that. I also found this gem and a bunch of nesting in the front bumper so there was a squirrel or chipmunk too. http://i193.photobucket.com/albums/z56/kutschca/white%20car/03890A86-7F46-4E5C-8E5E-A5C789FFBB48_zpsppxecrtf.jpg http://i193.photobucket.com/albums/z56/kutschca/white%20car/B24A9B18-E1F9-46E9-B6DA-7263B30270CD_zpsr4mgtblq.jpg Also swapped out shift knobs for my old factory one: http://i193.photobucket.com/albums/z56/kutschca/white%20car/CE318F90-0560-425E-A3B2-0F1968DE7AB4_zpsyqsesw1b.jpg All's well that ends well: http://i193.photobucket.com/albums/z56/kutschca/white%20car/FFDD2A80-B37A-4D8C-AAB2-52F0615533E3_zpsoahnir97.jpg Quote Link to comment Share on other sites More sharing options...
Miller Posted July 3, 2016 Report Share Posted July 3, 2016 I like it a lot. Wheels look very nice too. Good luck wrenching. Quote Link to comment Share on other sites More sharing options...
Smokey Posted July 3, 2016 Author Report Share Posted July 3, 2016 Next on the list of updates was that the rear window seal was Janky in the worst way. It had been broken and then someone put window weld or some goop in there. http://i193.photobucket.com/albums/z56/kutschca/white%20car/758ED148-460C-42EE-ADFF-CD6387A1A9E9_zpsnrt8poxk.jpg http://i193.photobucket.com/albums/z56/kutschca/white%20car/A1FD0230-730B-474C-9932-A66B88B57769_zpsrrzsv2vv.jpg In taking apart the rear to get it ready to fix I found another interesting surprise. As a part of the SWEET stereo install the previous owner had put dynamat like everywhere...annoying as crap: http://i193.photobucket.com/albums/z56/kutschca/white%20car/EB1A5975-3F36-4AD2-ADF8-A0B3015A1E32_zps51whb5dp.jpg This wouldn't be so bad if it wasn't annoying and messy to remove. Also he put it over plastic seams of parts and things like the strut towers where the rollbar would go. At this point I've only removed what I needed to due to time and frustration. I took the car to Harr's glass and they got the new seal installed without damaging the glass so I was happy about that. http://i193.photobucket.com/albums/z56/kutschca/white%20car/59A73A7D-AA8B-4BC7-AC0F-7BCCA0203180_zpsbmczvgbe.jpg Next up was the stereo...what a mess. So the dealer told me over the phone it was a "$4k stereo".......This car was a 2-owner car in that the original guy bought it and gave it to his son when he graduated med school and that guy kept it until this consignment lot sold it to me. My best guess is that this stereo actually cost $4k when it was done...in 1994...haha. THey used quality components, but the install was complete shit. It's been a while since I've seen a genuine Bazooka base tube and Clarion 6-disk CD changer. Quote Link to comment Share on other sites More sharing options...
Smokey Posted July 3, 2016 Author Report Share Posted July 3, 2016 Here's a great example of how the amp was mounted...or not...just behind the seat loose and they backed the seat up to hold it in place. Awesome wiring here is just the beginning. http://i193.photobucket.com/albums/z56/kutschca/white%20car/5689AA4D-36D8-42B7-A524-37F092C6A253_zpsotrmddwx.jpg Here's wiring leading to the back bass tube http://i193.photobucket.com/albums/z56/kutschca/white%20car/6921E49F-22F3-4CCC-A61E-E899845DA0C9_zpsoxxeuoxi.jpg In the back the bass tube wasn't hard-mounted either: http://i193.photobucket.com/albums/z56/kutschca/white%20car/8CF5D8E4-93F5-46BC-A026-9CB0B9F89F56_zps4oalxflh.jpg Here's the CD changer and the wiring with the amp out: http://i193.photobucket.com/albums/z56/kutschca/white%20car/B9E67C00-1288-46B9-A34E-AFC133207AFB_zpsnp1cjjtg.jpg http://i193.photobucket.com/albums/z56/kutschca/white%20car/85163C5C-2B75-4039-80A6-86921DB6AC59_zpsio6gaatl.jpg More dynamat in annoying places: http://i193.photobucket.com/albums/z56/kutschca/white%20car/99270CD0-1093-4D73-B8F1-9056CC493FE2_zpspbzow9ye.jpg http://i193.photobucket.com/albums/z56/kutschca/white%20car/8D0C5859-B371-41BB-A578-6B6B6174E8EF_zpsrxqeqjar.jpg sweet rear speakers. Note the cardboard used to make a custom fit...LOL http://i193.photobucket.com/albums/z56/kutschca/white%20car/3299B4E5-F6F2-41B9-9E3A-B46B6CD52A7E_zpsu5gtga7n.jpg wiring with the seat out: http://i193.photobucket.com/albums/z56/kutschca/white%20car/5D363376-CD70-4AA2-8CCE-88DF2FACFA7A_zps1ck2zr09.jpg http://i193.photobucket.com/albums/z56/kutschca/white%20car/04C96835-02FD-4A77-B371-83FD31A25D8B_zpslryuqkao.jpg also found bare wires: http://i193.photobucket.com/albums/z56/kutschca/white%20car/91334B0B-6FB2-4CE0-90B2-2549ED280BF8_zpssp9xti3m.jpg which I just put heat shrink on to cover up http://i193.photobucket.com/albums/z56/kutschca/white%20car/276209F4-2469-4DDC-8455-05AD06751541_zpsdxyjvd6p.jpg the fun of removing dynamat. once again - only doing what I need off at this point http://i193.photobucket.com/albums/z56/kutschca/white%20car/9FB2DEF7-787B-4E34-8526-69AC1EE1E58B_zpsc7otniob.jpg http://i193.photobucket.com/albums/z56/kutschca/white%20car/23B56B22-5E2B-4F94-BB4A-DCEAB0C1AEB1_zpsqvpugww8.jpg Quote Link to comment Share on other sites More sharing options...
Smokey Posted July 3, 2016 Author Report Share Posted July 3, 2016 Think you've got stereo install SKILLZ?! You've got nothing on this routing from the engine bay/battery to the interior..... http://i193.photobucket.com/albums/z56/kutschca/white%20car/823AE88F-4C24-489D-BD87-AC99CC75C06B_zpsm67vphf6.jpg Found a random switch I didn't know what it went to http://i193.photobucket.com/albums/z56/kutschca/white%20car/335F7260-4248-47FE-84F4-452E055D2EE2_zpsalpyi9dh.jpg Needless to say...this shit had to go http://i193.photobucket.com/albums/z56/kutschca/white%20car/F2B9463C-37D2-4FAA-AA9D-B8CB23B223AD_zpsaqtnyjbc.jpg Also pulled the stock tool kit from the rear as I wouldn't be using it and it's just more weight/rattle: http://i193.photobucket.com/albums/z56/kutschca/white%20car/442FBA2F-6397-4F87-A003-C030A14E56DA_zpsx482wpj2.jpg Removed the head unit as well. I haven't pulled the front door panels to remove the tweeters and door speakers, but I'll get to it. http://i193.photobucket.com/albums/z56/kutschca/white%20car/C28093D8-044C-4243-BA49-45DB8A1EBE83_zps1gvnnwgm.jpg http://i193.photobucket.com/albums/z56/kutschca/white%20car/01A3C948-018F-48AD-9D17-7B7AA02612AB_zpsbpglwfqm.jpg The solution? going no radio for the foreseeable future. Installed 2 of the factory closing DIN pockets: http://i193.photobucket.com/albums/z56/kutschca/white%20car/F2CBD510-F7EE-47B2-83FE-943C261BADDC_zpsjfanmvuh.jpg http://i193.photobucket.com/albums/z56/kutschca/white%20car/026280A0-BC17-4ADF-96A4-50BD55C58D0B_zpswunad3sr.jpg Quote Link to comment Share on other sites More sharing options...
Smokey Posted July 3, 2016 Author Report Share Posted July 3, 2016 I also got a chance to put on the front brakes. While doing that I also put on the brake cooling backing plates in anticipation that I would run the cooling hoses like on my old car. http://i193.photobucket.com/albums/z56/kutschca/white%20car/5A7826D7-6595-4277-8747-8918A0BE9335_zpshwwyoix1.jpg http://i193.photobucket.com/albums/z56/kutschca/white%20car/92AD3845-E105-43F1-BE52-66CCE7D6A7CE_zpsfxxmg9kd.jpg http://i193.photobucket.com/albums/z56/kutschca/white%20car/92AD3845-E105-43F1-BE52-66CCE7D6A7CE_zpsfxxmg9kd.jpg It was time to start prepping the old motor to go into the new car. I chose to go with the old motor since it was a known quantity to me. Not perfect (slightly lower compression on the rear rotor), but it's also taken 7 years of track abuse and I trust it. It's also supposedly a newer reman with the 2-piece factory apex seals in it which are better for my use. As best as I can tell the motor in the white car was the original 94 motor which is awesome to show that when not f'd with they stand up fine, but someone else can make use of it. I took it out and sold it. Would have been nice to keep a backup, but I don't have the space for now to do that. So the "old" motor is going in the white car, but it was also nasty and could use a "freshening". http://i193.photobucket.com/albums/z56/kutschca/white%20car/0CAEA137-8C81-4434-B885-99AE99D584FB_zps3k6axriw.jpg Quote Link to comment Share on other sites More sharing options...
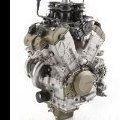
Smokey Posted July 3, 2016 Author Report Share Posted July 3, 2016 The plan for the motor is to clean up, replace external seals/gaskets, and overall make it nice and ready to go in the car. A couple of updates will happen with it, but I won't be opening the keg or changing anything power wise. First is taking off the clutch/flywheel. Not an easy task on the FD with the 54mm nut! Thankfully the Milwaukee M18 1/2" impact took it off. The torque spec is 340-ish ft/lb and it's slathered with red locktite. Took some serious hammering, but it came off. http://i193.photobucket.com/albums/z56/kutschca/white%20car/FD71C541-C8D7-4BE5-85FC-9F960562FF31_zpszh7qypug.jpg Once that was off, I could clean up the back of the motor, replace the rear main oil seal, and re-torque the engine studs. Thankfully most were very close to spec still (24ft lbs) and only one on the very outside gave me a heart attack with how far it turned. http://i193.photobucket.com/albums/z56/kutschca/white%20car/179E3F2B-8CC4-4868-9E6B-ADD210CF301F_zps5uusw7co.jpg tearing into the beast of complexity: http://i193.photobucket.com/albums/z56/kutschca/white%20car/775A38AC-AD99-4253-BFF0-73DD79962C84_zpszttgytmj.jpg things were just overall grungy/nasty and it needed A LOT of cleaning: http://i193.photobucket.com/albums/z56/kutschca/white%20car/9EAC96B2-7089-464D-A063-060BDC328D01_zpsj269bab5.jpg Quote Link to comment Share on other sites More sharing options...
Smokey Posted July 4, 2016 Author Report Share Posted July 4, 2016 examples of funk of crud/leaks over the years with the old car. I had never removed the motor in the old car and the previous owner had left me some crap to start with and it just accumulated over time. Now was a good time to try to de-grunge. examples of grunge going on http://i193.photobucket.com/albums/z56/kutschca/white%20car/FE4F87BC-8161-44C8-B8DD-3A5444AB0F6E_zpsidwyedsg.jpg http://i193.photobucket.com/albums/z56/kutschca/white%20car/49252092-83C8-4E98-9936-AD99A085019B_zpshbha8dqs.jpg http://i193.photobucket.com/albums/z56/kutschca/white%20car/0B80681A-795A-404D-8DCA-5689DCF48772_zpsy41nzluh.jpg http://i193.photobucket.com/albums/z56/kutschca/white%20car/D95C22D6-777C-422E-AF65-717542C339A3_zpss2cqmrik.jpg http://i193.photobucket.com/albums/z56/kutschca/white%20car/4D8BDEB2-4C54-4033-926F-2F4A3201E51C_zpse5nqf16j.jpg http://i193.photobucket.com/albums/z56/kutschca/white%20car/D9AA0A13-EC8F-4371-B32F-853E750E8661_zpsisxofxew.jpg I basically took off the components and scrubbed as best I could. I wasn't going for complete perfection here, but removing the grunge and making it so that whenever you touched something it wouldn't leave your hands greasy/oily like before. http://i193.photobucket.com/albums/z56/kutschca/white%20car/B440CAB6-3946-4C6B-A188-BA2DA6C770C4_zpsrihdxpxd.jpg http://i193.photobucket.com/albums/z56/kutschca/white%20car/BE0A9F88-B50D-4040-8AD8-8B2B127B4AFC_zpsghkf9xdv.jpg During this time I also changed the water pump to an upgraded unit from IR Performance, new WP gaskets, new oil injectors/crush washers, new intake manifold gaskets, new rubber lines for the coolant lines, new rubber lines for the fuel lines, cleaned fuel injectors, new fuel injector primary and secondary diffusers, new fuel injector O-rings, re-wrapped the engine wire harness, and I made my own "hyper ground" wires. Quote Link to comment Share on other sites More sharing options...
Smokey Posted July 4, 2016 Author Report Share Posted July 4, 2016 Updated water pump. Mostly different on the inner cone design where it's supposed to not cavitate as bad at high RPM. http://i193.photobucket.com/albums/z56/kutschca/white%20car/189E44F4-1D2E-49B0-899D-13BA60AA394B_zpskeg6e1ax.jpg I did get one new trick bit to add. Baconsports oil pan. It has an updated baffle plate up top, deeper sump with added capacity, trap doors to keep the oil around the pickup, and I like that it's welded not cast so it will bend if hit not crack and dump all contents. http://i193.photobucket.com/albums/z56/kutschca/white%20car/197DBC1C-55A2-483E-97DE-9770AF4190E6_zpsmturiyvg.jpg http://i193.photobucket.com/albums/z56/kutschca/white%20car/142A5F05-722E-47F6-AC51-F9FF5CD198C5_zpszarhnedm.jpg http://i193.photobucket.com/albums/z56/kutschca/white%20car/8B4866B5-0B73-45B2-A96D-67FEEFF8FFC1_zpsgwp65wky.jpg at this point I removed the stock motor from the white car http://i193.photobucket.com/albums/z56/kutschca/white%20car/772267DE-BC9A-459C-B423-8E3B26517D5A_zpsqbzdeq7c.jpg Time to start tackling the dirty/grungy engine bay: http://i193.photobucket.com/albums/z56/kutschca/white%20car/E2C4A1B1-75C6-46F4-A0E8-9ED75F26BECC_zpszcgkouxt.jpg http://i193.photobucket.com/albums/z56/kutschca/white%20car/425BD408-6383-427E-862A-E33DC7FEDC33_zpsoimztcoc.jpg http://i193.photobucket.com/albums/z56/kutschca/white%20car/4446F8AA-AA3A-4B65-B611-D479F10C6C9B_zpsna6r5dr0.jpg http://i193.photobucket.com/albums/z56/kutschca/white%20car/2656307C-0959-4035-8400-96055CC8F2A6_zpshmfhv6gd.jpg Quote Link to comment Share on other sites More sharing options...
Smokey Posted July 4, 2016 Author Report Share Posted July 4, 2016 funky under the black cowl trim too http://i193.photobucket.com/albums/z56/kutschca/white%20car/942E6DFA-C881-432F-A1F9-EDE02C1B7516_zpsstwdwn0p.jpg http://i193.photobucket.com/albums/z56/kutschca/white%20car/393D2FF0-EBDC-4C23-994B-3820F815EF7A_zpslt63uvag.jpg Getting that portion cleaned up: Didn't pressure wash, just good old fashioned scrubbing and cleaner. Tried to minimize water use to make sure wires or old electronics weren't harmed. Probably the nastiest as thought was the engine subframe which was caked with grease and oil http://i193.photobucket.com/albums/z56/kutschca/white%20car/6C3871BF-475E-4C63-80B7-1A9D035ED38E_zpsoned2zor.jpg http://i193.photobucket.com/albums/z56/kutschca/white%20car/783B9880-42B8-4353-80F0-8955B00A9A29_zpskwxdrxfm.jpg Quote Link to comment Share on other sites More sharing options...
Smokey Posted July 4, 2016 Author Report Share Posted July 4, 2016 back to the motor: I removed the "rats nest" of solenoids. I run "simplified sequential" where I've removed the air pump, ACV, EGR, and some other emissions stuff that mean I run less of the solenoids, but it's still a mess. I was taking this time to remove them, test them (both hot and cold), replace any that are necessary, and put on new silicone vacuum lines. here's what we're starting with: http://i193.photobucket.com/albums/z56/kutschca/white%20car/E5B80D43-B9DB-4BE1-B4BE-595BF971C0F6_zpsbslt0slz.jpg testing station on the kitchen table. the wife loves this for sure. http://i193.photobucket.com/albums/z56/kutschca/white%20car/BEBB1AE9-F87D-45EA-8912-54AE7471DAF9_zpspa5yx3zs.jpg http://i193.photobucket.com/albums/z56/kutschca/white%20car/7BADE77E-DD23-4F4E-9C35-32C94FA5053D_zpsoxljofc6.jpg all done. I ended up replacing 2 solenoids with other good ones I had http://i193.photobucket.com/albums/z56/kutschca/white%20car/F6EA6A30-26C8-465E-83E5-5DCC70493103_zpsflcafelm.jpg I cleaned up the lower and upper intake manifolds, removed any block off plates (for removed emissions stuff) and re-sealed with Hondabond HT which is my choice for just about everything that needs sealed up on this car. I then put DEI gold heat barrier on the outside of the LIM and the underside of the UIM. This was a bit of a learning experience. The LIM I tried to do in one big sheet...that was a mistake and looks like ass. The UIM I used smaller strips which works better, but still not perfect. If you're trying to cover complex surfaces then use small strips and overlap. Luckily these surfaces are barely visible when on the car so I'm not sweating it as long as they help with the heat. http://i193.photobucket.com/albums/z56/kutschca/white%20car/9F54E104-97BC-4D6A-89F3-15A3B34C3381_zpsjde5cg5a.jpg http://i193.photobucket.com/albums/z56/kutschca/white%20car/E4E7DFB9-2EFB-48E0-9C3C-7D95B4459323_zpswbtzsmii.jpg http://i193.photobucket.com/albums/z56/kutschca/white%20car/4D088937-F9D0-416C-BB3E-C7AF7D9D7FB9_zpsyo9fozfm.jpg http://i193.photobucket.com/albums/z56/kutschca/white%20car/2E00F35A-85F3-4F88-98A9-556517E4D1E5_zpsqmwjjbf2.jpg Quote Link to comment Share on other sites More sharing options...
Smokey Posted July 4, 2016 Author Report Share Posted July 4, 2016 one of the things I wanted to change from the old setup were the motor mounts. The old ones were polyurethane pucks that transmitted a lot of noise and vibration into the cabin of the car. I decided to go with Excessive motor mounts. I liked their design better than just the standard "hockey puck" design that is common with most FD aftermarket mounts. To use them I had to modify the driver's side aluminum mount. I had to cut off the nub and file it flat. I borrowed my buddies band saw for the big portion and then just used a crap ton of elbow grease and metal files to do the rest. grungy like everything else http://i193.photobucket.com/albums/z56/kutschca/white%20car/632BD957-4CFE-4322-B1DC-7474CAA606F9_zpszcmy7nrf.jpg http://i193.photobucket.com/albums/z56/kutschca/white%20car/CE88B014-D4FB-4A27-9E50-544F2EF671BB_zps4hjbufcz.jpg cleaned up and ready to go http://i193.photobucket.com/albums/z56/kutschca/white%20car/C56A5CAB-7819-4917-9327-0D7627D909F9_zpsepkzwnh8.jpg http://i193.photobucket.com/albums/z56/kutschca/white%20car/70451A57-EAA1-4AD9-988C-9DC71B4AE346_zpsjaeedbdu.jpg http://i193.photobucket.com/albums/z56/kutschca/white%20car/A64CB1A0-8B2B-42CD-948B-53156FB1F67C_zpsqolkq92i.jpg mount fitted http://i193.photobucket.com/albums/z56/kutschca/white%20car/2E219844-F7A1-4FA5-8051-E94C0951ED56_zpsut3hhflb.jpg Quote Link to comment Share on other sites More sharing options...
Smokey Posted July 4, 2016 Author Report Share Posted July 4, 2016 removing the old oil pan and oil pan brace. The new pan has a thicker flange which would take the place of a brace and also uses an oil seal to help with sealing which is always an issue on rotary motors. http://i193.photobucket.com/albums/z56/kutschca/white%20car/E3BC8676-5C86-49E6-AF53-1330FDFB6FF2_zpsqth2fdil.jpg I found this when I removed the old pan. The previous owner put so much damn silicone sealant on, that some got off and this was on the screen of the oil pickup!!!! You can see the texture of where it was stuck in the oil pickup screen! what a dope. Thank god there doesn't appear to be any long term damage. http://i193.photobucket.com/albums/z56/kutschca/white%20car/0BD65984-186C-4CB4-9966-267679EE1536_zps8gwx6yfq.jpg And here we have the crux of why rotary oil pans always leak. Here's a look at the dipstick with the oil pan off. Notice that in order to get the motor small enough and low enough that the damn oil level when full on the dipstick is like an inch above the oil pan flange/seal...no wonder it leaks. http://i193.photobucket.com/albums/z56/kutschca/white%20car/A9263E3D-41F4-4758-8E2B-771E6C6C9C46_zpsb5cnv5oq.jpg Putting on the new fancy pan. Nice THIN layer of Hondabond to help the seal. Hard to see, but you can also see the oil pickup extender which was a nice piece that came with the new pan. http://i193.photobucket.com/albums/z56/kutschca/white%20car/74BCB087-C40B-47E8-8653-1DD980C304B5_zpsfzsgiu9e.jpg Initially this corner wasn't pure flush, and I was a bit worried because the torque spec on the main bolts is very light at 100 in/lbs http://i193.photobucket.com/albums/z56/kutschca/white%20car/13A73925-4F21-4704-8CE9-2C1FB82ABA34_zpsotngackg.jpg There were cutouts for the supplied hardware to fit into the pan, but not all lined up perfectly so I put some washer to help even the load: http://i193.photobucket.com/albums/z56/kutschca/white%20car/2BFB8B4D-A89C-42C6-93AF-7E582E7E2CE9_zpszoyusfd7.jpg http://i193.photobucket.com/albums/z56/kutschca/white%20car/31A1AA46-AD57-4525-BDDD-8B1C58E8C8F1_zpsjhgmywf7.jpg once torqued that corner came down nicely. Also note that the motor mounts mount to the back of the oil pan on these motors which have a higher torque rating and also lead to oil pan sealing issues if not done at the same time. http://i193.photobucket.com/albums/z56/kutschca/white%20car/492F1C4E-6A06-4202-A1DC-20E43724B483_zps0hfqy16z.jpg http://i193.photobucket.com/albums/z56/kutschca/white%20car/2769856D-F8B9-43FD-9DD3-5CBE4A2D1F10_zpsgnb6nyku.jpg http://i193.photobucket.com/albums/z56/kutschca/white%20car/25479FE8-C05C-42FD-AA19-C7AB218C6933_zpsmdlsubmn.jpg Quote Link to comment Share on other sites More sharing options...
Smokey Posted July 4, 2016 Author Report Share Posted July 4, 2016 I sent out the injectors and fuel pump to be cleaned/tested/serviced. Unfortunately they came back showing at full bore them performing reasonably close to one another, but at lesser flows up to 20% difference. Their recommendation was to replace them. The fuel pump also had the relief valve constantly stuck open. SWEET. Here was a tough point. The fuel system I run in the FD is 4 of the stock 850cc secondary injectors. It's a compromise because the car runs too rich at idle and also has some low speed on/off throttle drivability issues. That being said, the motor/ECU are already tuned for it, and it has driven great on the track like that for 7+ years. I've wanted to change fuel setups for years to smaller primaries and newer injector dynamics secondaries. However this not only means the additional cost/complexity, but getting the car retuned which isn't an easy task. The closest place that I'd trust to tune the car is in Indiana. I was also working toward my first intended track day of May of this year and didn't want to risk the additional time to get the new setup going and getting it towed to Indiana to get tuned right now. Plus I was changing/doing A LOT on the car otherwise and didn't want to introduce one more variable if I could control it. So I bit the bullet and bought brand new injectors. Sucks to spend the money on new injectors that I know are a compromise, but I also know this setup will work for now. http://i193.photobucket.com/albums/z56/kutschca/white%20car/004730EA-A264-4CCD-867D-B7D0AF2378C1_zpszaf1iwis.jpg Of course I get one and the pintle cap is broken on arrival..sweet http://i193.photobucket.com/albums/z56/kutschca/white%20car/39E1838E-0921-48DD-9FC8-6E4F07F19208_zpsabvbwuik.jpg Fortunately I was able to swap one from the old injectors http://i193.photobucket.com/albums/z56/kutschca/white%20car/409E9004-3A59-487B-857B-3FD39E0EA9EE_zps5ynfyyzq.jpg Here you can see the harness re-wrapped in Tesa high temp tape. I didn't go crazy with it, just removed old/greasy tape, cleaned with electrical cleaner where needed and re-wrapped. http://i193.photobucket.com/albums/z56/kutschca/white%20car/E795AC23-1E22-4FA2-B685-8A7053175AA5_zpsildi02aw.jpg Also an example of my home made ground wires. I used 4 gauge grounding cable, copper connectors, and heat shrink. http://i193.photobucket.com/albums/z56/kutschca/white%20car/3D0675CB-14EC-4EB2-8DE8-92DEECBED3DD_zpsdkonhdne.jpg Once I got those things put back together it was time to put the motor back in http://i193.photobucket.com/albums/z56/kutschca/white%20car/FD061115-7A05-44B9-B483-7EB773B01A95_zpsdoxpuijt.jpg Quote Link to comment Share on other sites More sharing options...
Smokey Posted July 4, 2016 Author Report Share Posted July 4, 2016 next up the radiator went in http://i193.photobucket.com/albums/z56/kutschca/white%20car/DF1E0084-85B5-4178-AB5E-5D9CD2C5862E_zpsb2m3jm16.jpg I also replaced the coolant hoses for the heater core along the firewall before the motor went back in. next up was the oil system. I run what was originally the Crooked Willow dual oil cooler setup. As of this point the only original parts are the carbon fiber ducts (which are the best part honestly), and the stainless lines. I previously lost one of the original Mocal oil coolers during track use a couple of years ago, and I replaced it with a used Setrab unit a friend cut me a good deal on. Then when I wrecked I beefed the driver's side Mocal cooler, so that was being replaced with a new Improved Racing 19 row cooler this time. The previous owner had never run an oil thermostat which I wanted to change. So I was going to replace the driver's side cooler and add in an Improved Racing 180 degree thermostat. http://i193.photobucket.com/albums/z56/kutschca/white%20car/F74C4DAB-487B-4A63-B082-FE691444A9B2_zpsnsf79rae.jpg Here is the thermostat installed http://i193.photobucket.com/albums/z56/kutschca/white%20car/F4C09E14-AF2D-4C72-AFC0-0E7F7590B083_zpscxi3uzgw.jpg I had to make new mounting brackets as the old ones were broken in the wreck and frankly junky anyway. Mine weren't going to be artwork either, but should at least do. I got some strips of aluminum and used my fun tool of the vise break http://i193.photobucket.com/albums/z56/kutschca/white%20car/08D2A883-F5CB-498A-B743-298DB318756A_zpsgh6vfoo7.jpg Here's an example of one of the brackets with the new oil cooler and carbon duct installed http://i193.photobucket.com/albums/z56/kutschca/white%20car/B4515022-67D2-4396-9340-5EAC43E5DBF3_zpsps2dijyv.jpg http://i193.photobucket.com/albums/z56/kutschca/white%20car/5EEF9A2C-872A-475D-BE0A-2FAC3FE38A6B_zpseasjqf0t.jpg Quote Link to comment Share on other sites More sharing options...
Smokey Posted July 4, 2016 Author Report Share Posted July 4, 2016 next up was the fuel system. The factory FD's had notorious fuel slosh issues at anything below 1/2 tank. My old car the previous owner said he had a 99' spec tank installed with better baffles. It may be the one thing he wasn't full of shit on as it would drive all the way down to 1/8 tank without issue. I didn't want to screw it up, so I never even opened the tank...until I smashed it into a wall. I believe I pulled out one of the magic pieces, but it was bent and I was unsure how to connect it. So, I'm going to try out an in-tank fuel surge tank setup system that was developed with one of the SCCA SSM national auto-x winning cars. Here's the general setup. The fuel pump return feeds into the top of the tank, and the fuel pump draws from the bottom. The red check valve will let in fuel into the tank if the level is higher in the larger gas tank, and keep it in if the surge tank level is higher. http://i193.photobucket.com/albums/z56/kutschca/white%20car/A1BD238D-7B14-4313-8C71-6B4C6B8103EA_zpsvr3ykspo.jpg Going to install and of course the fuel pump access is grungy http://i193.photobucket.com/albums/z56/kutschca/white%20car/C47AFF73-A7EC-473F-BECF-C328C8C3CDB3_zpsex7hdziq.jpg Cleaned it up so as to not dump dirt/grit into the tank http://i193.photobucket.com/albums/z56/kutschca/white%20car/37A7B80D-D654-4815-BD31-78D268478CE5_zpswgzzbrw7.jpg Getting this thing installed in the tank is less than enjoyable. First of all, everything has to go thru the fuel pump hangar access, second it has to be done in pieces: http://i193.photobucket.com/albums/z56/kutschca/white%20car/F2D00FCD-B64F-45DE-A11E-797DC68B8014_zpsgt6py3pg.jpg Can't even get the thing in there with the fittings installed. To install it has brackets which slip under the factory fuel pump tray and then it's secured to the top of the tank with a bracket that goes around the vapor valve http://i193.photobucket.com/albums/z56/kutschca/white%20car/5AAC8DC5-53B6-446C-8E44-35F9E6A0BEEE_zpszznba4ou.jpg http://i193.photobucket.com/albums/z56/kutschca/white%20car/DF2591B6-0BF4-4E9F-92B3-7ADC8EE74FC7_zpsllkcd1jc.jpg Then I installed the new Rotary Performance Denso fuel pump. It's a tight fit for sure and there are plenty of forearm cuts and scrapes to prove that. Quote Link to comment Share on other sites More sharing options...
Smokey Posted July 4, 2016 Author Report Share Posted July 4, 2016 There are 3 main things I'm trying to differ on this car compared to the old one. 1. Can I keep the power steering? 2. Can I keep the A/C? 3. Can I keep the stock hood? The old car had no P/S, A/C and had a vented hood and always ran cool at the track, but I didn't like the hood visually, the lack of P/S could make 30 minute track sessions a decent amount of work, and A/C...you know that's nice to have and all. So on the P/S front I installed a cooler to help make sure it didn't boil over: http://i193.photobucket.com/albums/z56/kutschca/white%20car/946930A3-1222-4B22-A081-C9919EC16E25_zpsvazatm07.jpg Got the turbo manifold freshly resurfaced http://i193.photobucket.com/albums/z56/kutschca/white%20car/D7203E0E-7746-434E-BE6B-76B552888549_zpslyp89rmi.jpg Got my HKS downpipe ceramic coated http://i193.photobucket.com/albums/z56/kutschca/white%20car/69ECFAD0-5E42-446D-800B-BF1F1EF0A862_zpsfksdeqxj.jpg Turbos installed http://i193.photobucket.com/albums/z56/kutschca/white%20car/F8423B90-52FD-4CC9-9FB2-7C9D4602B70A_zpsacnz3ynv.jpg Tinman custom made me a sweet battery tray for the Shorai battery I run, got that put in with the Efini y-pipe http://i193.photobucket.com/albums/z56/kutschca/white%20car/5996E013-A76F-4E0C-ABD4-9A0CCD2DB127_zpstqwwesi7.jpg Quote Link to comment Share on other sites More sharing options...
Smokey Posted July 4, 2016 Author Report Share Posted July 4, 2016 cleaning up the power steering pump before install http://i193.photobucket.com/albums/z56/kutschca/white%20car/E0E1DF73-6F24-4EDE-8461-008C31006061_zpswslbqizt.jpg http://i193.photobucket.com/albums/z56/kutschca/white%20car/415D1641-FCF5-4728-B4CA-8C4BE3E202DA_zpsh3h2dssg.jpg http://i193.photobucket.com/albums/z56/kutschca/white%20car/37223E7F-778C-49FD-8EE2-995CDD3B5355_zpsgyrocshk.jpg PFC installed with the TurboJeff bracket which is a great piece and much better than the typical install which is just flopping around or velcro'd behind the panel. http://i193.photobucket.com/albums/z56/kutschca/white%20car/A8E1864A-43A1-4A74-BF11-80AA2744748D_zpsxdn795zl.jpg With the diff out, it was time to change the fuel filter because it's WAY easier with the diff out. http://i193.photobucket.com/albums/z56/kutschca/white%20car/93BCF7CD-E2E6-4801-A1D8-CFC885DA1524_zpsl7p8hg3k.jpg The underside of the car is surprisingly clean especially when compared to the engine bay http://i193.photobucket.com/albums/z56/kutschca/white%20car/5669D973-E59B-424D-A245-52BCF1F0FFEB_zpsldjqzrei.jpg Diff in with the Greddy diff cover which just barely clears the subframe http://i193.photobucket.com/albums/z56/kutschca/white%20car/596AF3AF-C698-43BF-927F-A07D40E506C0_zpsf27sjivz.jpg intercooler installed, also made a bracket and installed the catch can http://i193.photobucket.com/albums/z56/kutschca/white%20car/7B5AAFAF-B430-4C6C-9CB5-D2DFA641FC35_zpsz5xk0zcs.jpg ran into my first issue with keeping the A/C. The hardline against the firewall prevents the primary turbo intake from fitting appropriately...doh. Had to rig it up with a silicone hose/coupler for now http://i193.photobucket.com/albums/z56/kutschca/white%20car/0612383E-DE54-4F44-85D3-CDE3A05BD1FE_zpsuqibjebt.jpg Quote Link to comment Share on other sites More sharing options...
Smokey Posted July 4, 2016 Author Report Share Posted July 4, 2016 Tinman installed a custom rollbar in the car that's welded in. Same design as the old car which held up quite well during "testing" so I trust it. Plus I don't like the bolt-in solutions since they come further forward into the driver's space and going thru the flimsy floor isn't ideal at all. I had to paint the wheel wells to keep the back side of the welds from rusting. I didn't want to get overspray on the car so I got a little OCD on prep. Got a cheap-o car condom to use complete with sweet Engrish http://i193.photobucket.com/albums/z56/kutschca/white%20car/EDCAB672-7BAA-4048-923F-3AEA33170AE5_zpszqcghfv4.jpg http://i193.photobucket.com/albums/z56/kutschca/white%20car/AB286EAA-4B82-40F1-8895-34539DB70328_zpsvw1jbbbp.jpg http://i193.photobucket.com/albums/z56/kutschca/white%20car/A6BC2595-746F-418D-8A92-730F5E09A452_zps6s9hzwsm.jpg Rollball picture of the front mounting plates. Tinman was also able to help re-fit the interior plastics from the old car without needing to cut up the nice pieces removed from the new car. Makes for a nice install. http://i193.photobucket.com/albums/z56/kutschca/white%20car/EB648F8F-EB4A-443E-AAA3-7DD352A8C06C_zpsubn7pz5w.jpg http://i193.photobucket.com/albums/z56/kutschca/white%20car/585B8FA3-24AE-4E04-B934-DD2AC2A50A6B_zpsovoojjdl.jpg Quote Link to comment Share on other sites More sharing options...
Smokey Posted July 4, 2016 Author Report Share Posted July 4, 2016 intercooler and intakes finished installing http://i193.photobucket.com/albums/z56/kutschca/white%20car/82D658FB-2F8F-4381-A1A2-AC210E55351B_zpsqz3fgeyv.jpg First startup went well. Couple of small coolant leaks that needed cinched up, but nothing major. Time for the first drive. I didn't have the boost guage hooked up yet, so I had to rig something up to make it work for a drive. http://i193.photobucket.com/albums/z56/kutschca/white%20car/6FA45807-20F2-41F9-A26D-3E684C9A46A8_zpslaruam8i.jpg http://i193.photobucket.com/albums/z56/kutschca/white%20car/62971CCA-DCEE-4E69-888E-37189111FB72_zpscwiejevt.jpg Installed the shifter from the old car. It's just a cut down stock shifter, but I always liked the feel/throw so I've kept it. http://i193.photobucket.com/albums/z56/kutschca/white%20car/92DB6081-D03A-403D-8331-0D32BB6D221C_zpsumzog8et.jpg First drive went well overall. front sway bar was clunky and some other minor gripes, but nothing alarming which is great. Still a lot to do for the first track day though. Still getting the interior together Tinman also helped by modifying the aluminum seats to mount to my Atomic Rex seat mounts and put the seat back brace on. I also had Hoblick powder coat the seats black to look a little more in place in the black interior http://i193.photobucket.com/albums/z56/kutschca/white%20car/BB005202-D43E-4B16-9230-05AD3ABEC37A_zps0wxopjij.jpg http://i193.photobucket.com/albums/z56/kutschca/white%20car/5744D36E-E5F0-441E-8060-B0BF1275D97B_zps4gejlt2e.jpg http://i193.photobucket.com/albums/z56/kutschca/white%20car/E95C0438-547F-4C12-8D35-6FA83C1287E7_zps3nytxhp0.jpg http://i193.photobucket.com/albums/z56/kutschca/white%20car/743BAB80-57F9-4F01-AEB1-45A08C166F6D_zpsft1izcyq.jpg seat mounts installed with anchors for the belts http://i193.photobucket.com/albums/z56/kutschca/white%20car/EE3A5F33-8ADC-4246-9076-93762B41262C_zps0muutqmd.jpg Driver's seat installed http://i193.photobucket.com/albums/z56/kutschca/white%20car/BDC8EC92-721B-48DB-898D-9218B19B83D4_zpsww1ud97k.jpg Passenger seat installed with harnesses and fire extinguisher mounted http://i193.photobucket.com/albums/z56/kutschca/white%20car/7346B63C-D362-49E0-9933-E1DC110F724E_zps1xakwy57.jpg Close up of the seat back brace installed http://i193.photobucket.com/albums/z56/kutschca/white%20car/4F0AFFFB-1EC8-4410-905D-1EC3353868D9_zpsknavxi0l.jpg Had to modify the shifter panel a bit to fit the PFC commander like I had in the old car. Pains me to do it, but I like it mounted there where it's clean. http://i193.photobucket.com/albums/z56/kutschca/white%20car/83C76363-FE65-4748-B267-CC6E0D40823C_zpsb14f8ak4.jpg Installed with the Sparco steering wheel, and the new location for the coolant and temp gauge. http://i193.photobucket.com/albums/z56/kutschca/white%20car/2DE77E26-31DA-40B9-983D-2B22BEE5F741_zpsnyzdrcoi.jpg http://i193.photobucket.com/albums/z56/kutschca/white%20car/3DDFD9D3-ECDC-4EB3-987E-22583AF664E6_zpspytval0m.jpg Quote Link to comment Share on other sites More sharing options...
10phone2 Posted July 4, 2016 Report Share Posted July 4, 2016 good lord thats alot of detail work. Great progress. Quote Link to comment Share on other sites More sharing options...
dover Posted July 4, 2016 Report Share Posted July 4, 2016 Awesome read, very nice work. Can't wait to see this thing out on the track Quote Link to comment Share on other sites More sharing options...
Mojoe Posted July 4, 2016 Report Share Posted July 4, 2016 RX-7 done right! Chris, this is an outstanding build thread. So many parts mad me remember working on many of those things, and wishing I had done other things at times. You build is exactly what I have in mind for how an FD should be. I have not committed the funds to get to where your is. But, now I have a cheat thread to reference for what I have left to do. This car is going to be so fun on the track. Thank you for taking the time to document and post this. P.S. Most expensive 330 HP set up ever. HAHAHA Quote Link to comment Share on other sites More sharing options...
Smokey Posted July 4, 2016 Author Report Share Posted July 4, 2016 Thanks guys. I'm late on dumping this info into a build thread so I'm sure I'm forgetting stuff along the way. I'll see if I can get us up to date later today during down time with the family. I have had the benefit of acquiring a lot of the big parts over the years of owning the old car so yes big money stuff like the AP brakes and Ohlins were "sunk costs" and a motivator to me to continue on the FD platform. Joe you're correct that this could be one of the very few FD builds that doesn't focus on making power. Haha. I'm sure I'll get there eventually, but first I need to maximize the rest of the car setup and that'll be last. Quote Link to comment Share on other sites More sharing options...


Recommended Posts
Join the conversation
You can post now and register later. If you have an account, sign in now to post with your account.