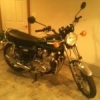
Khymera-B Posted October 11, 2011 Report Share Posted October 11, 2011 (edited) I've been redesigning my '03 6RR for the past two months now. Completion is coming to a close and I must say that I am anxious, to say the least. My first complete DIY on a single project. Everything, but the tire change has been done by me, bodywork (a 1st), etc. Complete parts summary will be included at finish.This bike build actually came about between a Michigan fan in my family and my own ambition to produce a project. So I'll be ready before OSU vs M.Now off to the picsThe BeginningThe Photoshop45min after the PhotoshopLast weekThis week Edited October 13, 2011 by Khymera-B Quote Link to comment Share on other sites More sharing options...
jester3681 Posted October 11, 2011 Report Share Posted October 11, 2011 Looks good so far - how are you doing the Block O? Paint or decal? Quote Link to comment Share on other sites More sharing options...
Khymera-B Posted October 11, 2011 Author Report Share Posted October 11, 2011 (edited) Looks good so far - how are you doing the Block O? Paint or decal?Red paint on the O, soft feel paint (velvet texture, matte finish) on the leaf(ves). Final decals for tail and opposing side are not set, but tail will be paint, some lower decals will be vinyl. Edited October 11, 2011 by Khymera-B Quote Link to comment Share on other sites More sharing options...
conn-e-rot Posted October 11, 2011 Report Share Posted October 11, 2011 Looks like a good start Quote Link to comment Share on other sites More sharing options...
jbot Posted October 11, 2011 Report Share Posted October 11, 2011 the power commander fits nice in the hidden tool box area. also, survives crashes well in there lol Quote Link to comment Share on other sites More sharing options...
Beegreenstrings Posted October 11, 2011 Report Share Posted October 11, 2011 wow! cant wait to see it done. Quote Link to comment Share on other sites More sharing options...
Mykill Posted October 13, 2011 Report Share Posted October 13, 2011 Awesome cant wait to see the finished product. Thinking about trying to paint mine this winter. What kind of paint set up/process are you using? Quote Link to comment Share on other sites More sharing options...
Khymera-B Posted October 13, 2011 Author Report Share Posted October 13, 2011 (edited) Awesome cant wait to see the finished product. Thinking about trying to paint mine this winter. What kind of paint set up/process are you using?I'm using a full service body shop, my cousin is the owner/operator and has done many custom jobs and bodywork in this area. Gorgeous work, he's been my guide. I hit the damaged plastics w/ the DA grinder, followed by 80gr. Fiberglassed the front turn signal portions (one side had a giant hole that looked like someone attempted to repair as well as other road rash on other places), Applied bondo, then mud. Re-80gr the fairing repair to level. Then scuffed all the plastics w/ 180 using the DA sander and used a red scotchbrite on the corners & any other remaining shiny areas, then primer. Next I'll either scuff the primer w/ 320 and apply sealant, and scuff again, or seal the primer and then scuff (whichever he says), but color application will follow, then clear, then another sanding and finish with painting the stencils, clearing them, sanding them, and then applying texture. ACTUALLY THE SEALANT IS OUT OF ORDER IN THESE INSTRUCTIONS.All in all it adds up to tedious. Takes patience, hurry up and wait, lots of sanding pads, lots of elbow grease (even using DA's, and especially the scotchbrite), but it's not AS bad as it sounds. Requires attention and time for expected results. 4 colors = lots of paint for a small job, 1 quart urethane clear, 1 quart textured clear, + all hardners, fiberglass, catalyst, thinners, bondo, & mud or duraglass Edited October 22, 2011 by Khymera-B Quote Link to comment Share on other sites More sharing options...
Khymera-B Posted October 13, 2011 Author Report Share Posted October 13, 2011 Sprockets arrived. Quote Link to comment Share on other sites More sharing options...
Khymera-B Posted October 22, 2011 Author Report Share Posted October 22, 2011 Line and caliper pics tomorrow, lead by more sanding Quote Link to comment Share on other sites More sharing options...
jester3681 Posted October 22, 2011 Report Share Posted October 22, 2011 Like those calipers, B! Quote Link to comment Share on other sites More sharing options...
Khymera-B Posted October 22, 2011 Author Report Share Posted October 22, 2011 Like those calipers, B!Thanx 4 the compliment. I just reinstalled the rear. I'll finish up the fronts and refill and bleed 2morrow when I complete paint prep. Oh... I introduce. "The Rose" Quote Link to comment Share on other sites More sharing options...
600ZZ4eb Posted October 22, 2011 Report Share Posted October 22, 2011 Dude ur biotech dill b sweet. Can't wait to c the end result. Make sure u get some class A sliders for that bad boy too. Quote Link to comment Share on other sites More sharing options...
Khymera-B Posted October 23, 2011 Author Report Share Posted October 23, 2011 Quote Link to comment Share on other sites More sharing options...
APCh8r Posted October 23, 2011 Report Share Posted October 23, 2011 Calipers and lines look good but what is up with your seat cover? Looks like you need to pull it a lot tighter.... Quote Link to comment Share on other sites More sharing options...
Khymera-B Posted October 23, 2011 Author Report Share Posted October 23, 2011 Calipers and lines look good but what is up with your seat cover? Looks like you need to pull it a lot tighter....It's not stapled down yet. Quote Link to comment Share on other sites More sharing options...
gen3flygirl Posted October 31, 2011 Report Share Posted October 31, 2011 keep up the good work Quote Link to comment Share on other sites More sharing options...
Khymera-B Posted November 16, 2011 Author Report Share Posted November 16, 2011 Video Walkaround: http://youtu.be/vQb6WYzHc3sI would have done a writeup but I don't have permissions for the How-To Section but here's..HID Install: Quote Link to comment Share on other sites More sharing options...
Khymera-B Posted November 16, 2011 Author Report Share Posted November 16, 2011 FedEx came with gifts while I was working... Quote Link to comment Share on other sites More sharing options...
optimoprime Posted November 16, 2011 Report Share Posted November 16, 2011 coming along quickly Quote Link to comment Share on other sites More sharing options...
Khymera-B Posted November 18, 2011 Author Report Share Posted November 18, 2011 Yep Quote Link to comment Share on other sites More sharing options...
Khymera-B Posted November 19, 2011 Author Report Share Posted November 19, 2011 Design Update.. Quote Link to comment Share on other sites More sharing options...
Bad324 Posted November 21, 2011 Report Share Posted November 21, 2011 coming along real nice, gonna be badass when its done Quote Link to comment Share on other sites More sharing options...
Beegreenstrings Posted November 23, 2011 Report Share Posted November 23, 2011 come on lets see it... Quote Link to comment Share on other sites More sharing options...
Khymera-B Posted November 23, 2011 Author Report Share Posted November 23, 2011 come on lets see it... I know right! Still waiting on the paint to be laid so I can reassemble. Not sure if the stencils are back yet. Quote Link to comment Share on other sites More sharing options...


Recommended Posts
Join the conversation
You can post now and register later. If you have an account, sign in now to post with your account.