TheBrown57 Posted April 25, 2014 Report Share Posted April 25, 2014 Per Red Barron's request here's my "How-to" for LED instalation.I ordered everything on Amazon aside from a toggle switch and priamary wire I picked up from walmart/autozone.The company I prefer to get my LEDs from is HitLights on Amazon, they have a great product at some awesome prices.A side note- when you order your LEDs from where ever you decide make sure they are 12v DC powered so you don't need any kind of inverter and also the weather proof LEDs will be slightly less bright as compared to te non weather proof due to the protective coating they put over them.Here's everything you will probably need for a basic installYes the Monster is crucial to the sucess of your install The stuff- LED strip connectors- 5 meter strip of LED's of your color choice- 40ft of red/black primary 18ga wire- Electrical tape (you will need a lot of this if you want to hide the wire or you can get some heat shrink and Techflex)- Zip Ties- Crimper for the battery terminal connectors- Toggle switch of your choiceMORE PICS!The connectors have a clip that you flip up to reveal the contact pointsYou can keep them as one piece if you want to have a couple wired together but make sure you end up haveing the positive and negative leads right!***FOR WEATHER PROOF ONLY***Take a knife and cut through the weather coating so you can get to the contacts***BE CAREFUL NOT TO CUT TO FAR AND CUT THE ACTUAL STRIP***I did on a couple in this install Now you have positive and negative leads to wire up!Now it's up to you to figure out where you want to put the LEDs and how to run the wires. Just hook them up to the postive and negative on the battery and add a toggle switch on the positive wire.I currently have 2 RF remotes shipping to me to hook up to both of the bikes but they are taking there sweet ass time to get here so I wired up a toggle switch for now. 2 Quote Link to comment Share on other sites More sharing options...
Helmutt Posted April 25, 2014 Report Share Posted April 25, 2014 Looks simple enough. I rarely ever ride at night, so I wouldn't get use of this....but cool little write up. Either of those bikes' yours? Or are you still caging it everywhere? Quote Link to comment Share on other sites More sharing options...
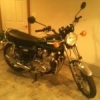
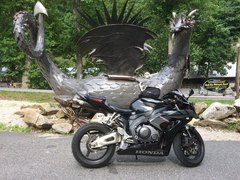
TheBrown57 Posted April 25, 2014 Author Report Share Posted April 25, 2014 Looks simple enough. I rarely ever ride at night, so I wouldn't get use of this....but cool little write up. Either of those bikes' yours? Or are you still caging it everywhere?Still caging it, both bikes are friends of mine who wanted lights. They do have an extra bike that I may be able to jump on hear and then, old Vulcan 750. Quote Link to comment Share on other sites More sharing options...
egobuster1 Posted April 25, 2014 Report Share Posted April 25, 2014 where did you get those connectors at for the LED strips.When i did mine i actually had to solder the wire directly onto the led strip which was a pain in the ass!! Quote Link to comment Share on other sites More sharing options...
TheBrown57 Posted April 25, 2014 Author Report Share Posted April 25, 2014 where did you get those connectors at for the LED strips.When i did mine i actually had to solder the wire directly onto the led strip which was a pain in the ass!!You can click the link in the original post for the LED connectors on Amazon. Makes wiring them a hell of a lot easier Quote Link to comment Share on other sites More sharing options...
egobuster1 Posted April 25, 2014 Report Share Posted April 25, 2014 wow i wish i would of known these existed like 2 weeks ago!!! loli guess if my solders break then ill just use these instead Quote Link to comment Share on other sites More sharing options...
redbarron77 Posted April 25, 2014 Report Share Posted April 25, 2014 is there anything that should be put over the LEDs to protect them from rocks, etc? Quote Link to comment Share on other sites More sharing options...
TheBrown57 Posted April 25, 2014 Author Report Share Posted April 25, 2014 is there anything that should be put over the LEDs to protect them from rocks, etc?Well they have a rubber coating for the weather proof and so far the ones on my car have held up and have not noticable signs of breaking Quote Link to comment Share on other sites More sharing options...
GixxerTravis Posted December 8, 2014 Report Share Posted December 8, 2014 I need to remember this... so I'm commenting Quote Link to comment Share on other sites More sharing options...
Customize IT Posted May 18, 2016 Report Share Posted May 18, 2016 All you need for a LED install is a electronic flasher unit that says LED on the side of it. They come in 2,3,4, or 5 pins models. Just plug it into your bike in the existing harness. The traditional thermal flasher units work by heating a spring inside them making and breaking a contact set. With LEDs they do not draw enough amperage to heat the spring. With the LED unit it uses a electronic timer to make and break contacts in a precise time base. They will work with any bike and also will not change time base like thermal flasher with the number of bulbs or current draw of them making the thermal units flash slower or faster. One thing to be aware of is the number of bulbs in the circuit. The LED flashers are rated from 2 to 6 bulbs and can be used in a mixture of incondestant and LED bulbs. The LED flasher units can be bought off the self around 15$ at any auto parts store like O Reighl's. There is another way using the thermal flasher by installing a 100 OHM resistor in line before the LED bulb to make a large enough current draw for them to work. The 100 OHM resistors were sold at Radio Shack. With this method you still have the problem that the flasher may flash to fast or slow. Quote Link to comment Share on other sites More sharing options...
TheBrown57 Posted May 18, 2016 Author Report Share Posted May 18, 2016 12 hours ago, Customize IT said: All you need for a LED install is a electronic flasher unit that says LED on the side of it. They come in 2,3,4, or 5 pins models. Just plug it into your bike in the existing harness. The traditional thermal flasher units work by heating a spring inside them making and breaking a contact set. With LEDs they do not draw enough amperage to heat the spring. With the LED unit it uses a electronic timer to make and break contacts in a precise time base. They will work with any bike and also will not change time base like thermal flasher with the number of bulbs or current draw of them making the thermal units flash slower or faster. One thing to be aware of is the number of bulbs in the circuit. The LED flashers are rated from 2 to 6 bulbs and can be used in a mixture of incondestant and LED bulbs. The LED flasher units can be bought off the self around 15$ at any auto parts store like O Reighl's. There is another way using the thermal flasher by installing a 100 OHM resistor in line before the LED bulb to make a large enough current draw for them to work. The 100 OHM resistors were sold at Radio Shack. With this method you still have the problem that the flasher may flash to fast or slow. I know my picture links are broken and that is some good information but doesn't pertain to the topic of my original post. This was about installing LED's as underglow type lighting. Quote Link to comment Share on other sites More sharing options...
Customize IT Posted May 18, 2016 Report Share Posted May 18, 2016 Sorry I read into the topic wrong. The installation of the underglow lights are quite simple never seen anyone do a write-up for them. MUCH Respect! 1 Quote Link to comment Share on other sites More sharing options...
TheBrown57 Posted May 18, 2016 Author Report Share Posted May 18, 2016 Sorry I read into the topic wrong. The installation of the underglow lights are quite simple never seen anyone do a write-up for them. MUCH Respect! I had posted a picture of a couple finished bikes I did for some friends and someone asked for a write up lol Quote Link to comment Share on other sites More sharing options...
Customize IT Posted May 18, 2016 Report Share Posted May 18, 2016 I have been know to light up motorcycles also. MUCH Respect Again! 1 Quote Link to comment Share on other sites More sharing options...

.thumb.jpg.52de5bad1c61eb1eda62855e68043598.jpg)


Recommended Posts
Join the conversation
You can post now and register later. If you have an account, sign in now to post with your account.